
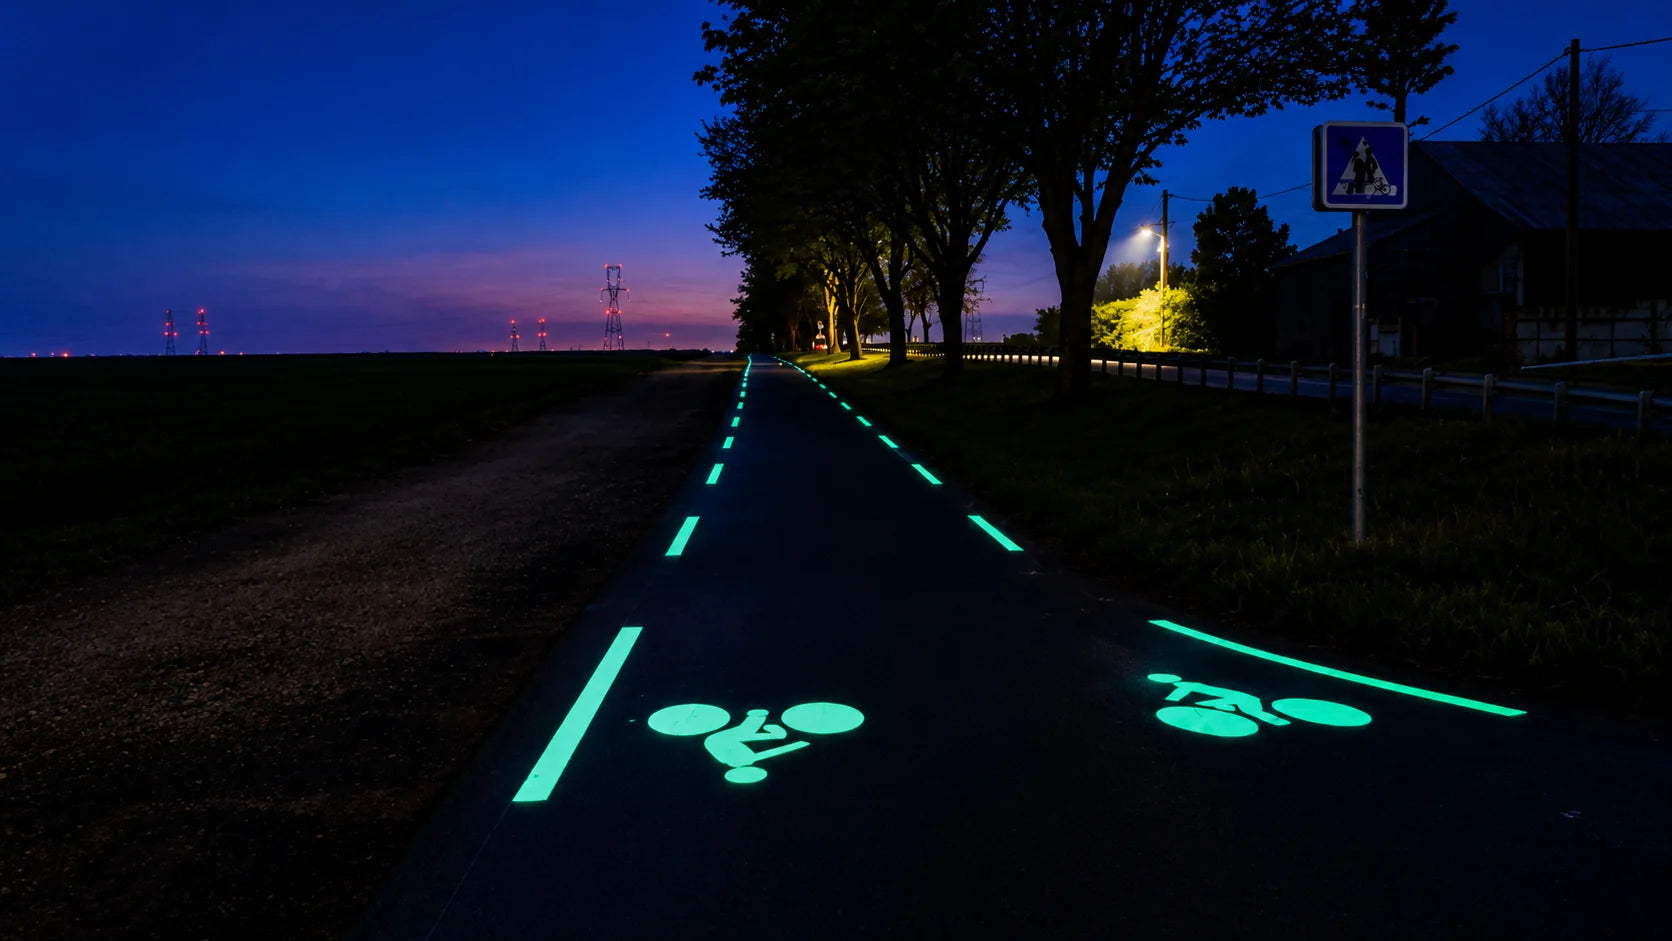
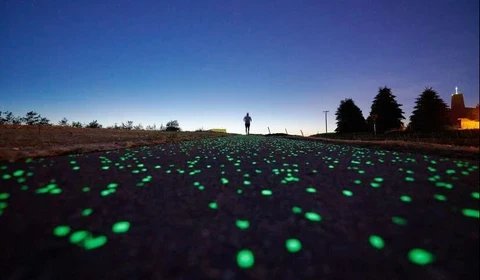
Many landscape projects want nighttime visibility without turning the entire environment into a brightly illuminated space.
This is especially relevant for:
-
scenic parks
-
nature trails
-
resort landscapes
-
waterfront paths
-
mountain attractions
-
botanical gardens
-
dark-sky areas
-
low-light recreational routes
In these environments, too much artificial lighting can change the atmosphere of the site.
A brightly illuminated pathway may be functional, but it can also compete with the night landscape.
This is where photoluminescent pavement becomes interesting.
Instead of projecting strong light into the surrounding environment, photoluminescent aggregate creates a softer glow directly at the pavement surface.
For landscape designers and project buyers, the key question is not:
“How bright can we make the pathway?”
A better question is:
“How much nighttime guidance does the route actually need?”
Why Low-Light Landscapes Need a Different Design Strategy
A city sidewalk and a scenic nature trail should not automatically use the same nighttime design.
In an urban area, there may already be:
-
street lighting
-
building lights
-
vehicle headlights
-
advertising signs
In a scenic park, the design goal may be completely different.
The project may want to preserve:
-
darkness
-
natural views
-
stars
-
landscape atmosphere
-
wildlife-sensitive areas
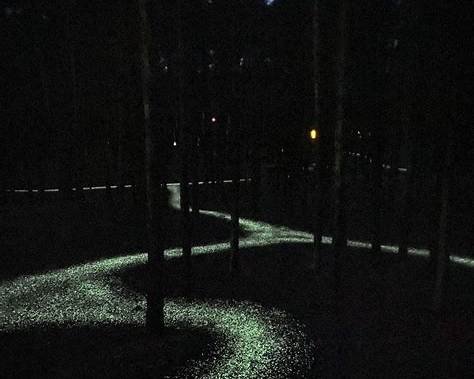
That means the pathway should remain visible without becoming the brightest object in the environment.
Photoluminescent aggregate can support this type of design because the luminous effect stays close to the pavement surface.
Photoluminescent Pavement Is Not the Same as Lighting
This distinction is important.
A lamp illuminates the surrounding space.
Photoluminescent aggregate mainly makes the surface itself visible.
That means it is better suited to:
-
route recognition
-
decorative guidance
-
pathway definition
-
edge highlighting
-
nighttime visual identity
It should not automatically be treated as a replacement for lighting required by local safety standards.
Where stronger illumination is necessary, conventional or solar lighting may still be required.
Photoluminescent pavement works best as part of a layered design.
Start With the Route, Not the Material
Before choosing glow color or particle size, study the pathway itself.
Look for:
-
straight sections
-
curves
-
intersections
-
steep areas
-
entrances
-
viewing platforms
-
bridges
-
steps
-
narrow zones
Not every meter of the trail needs the same luminous treatment.
For example, a straight 100-meter section may need only light visual guidance.
A sharp curve may need stronger luminous emphasis.
An intersection may need a different pattern.
This type of zoning can improve both visual clarity and material efficiency.
Path Edges Can Be More Useful Than Full-Surface Coverage
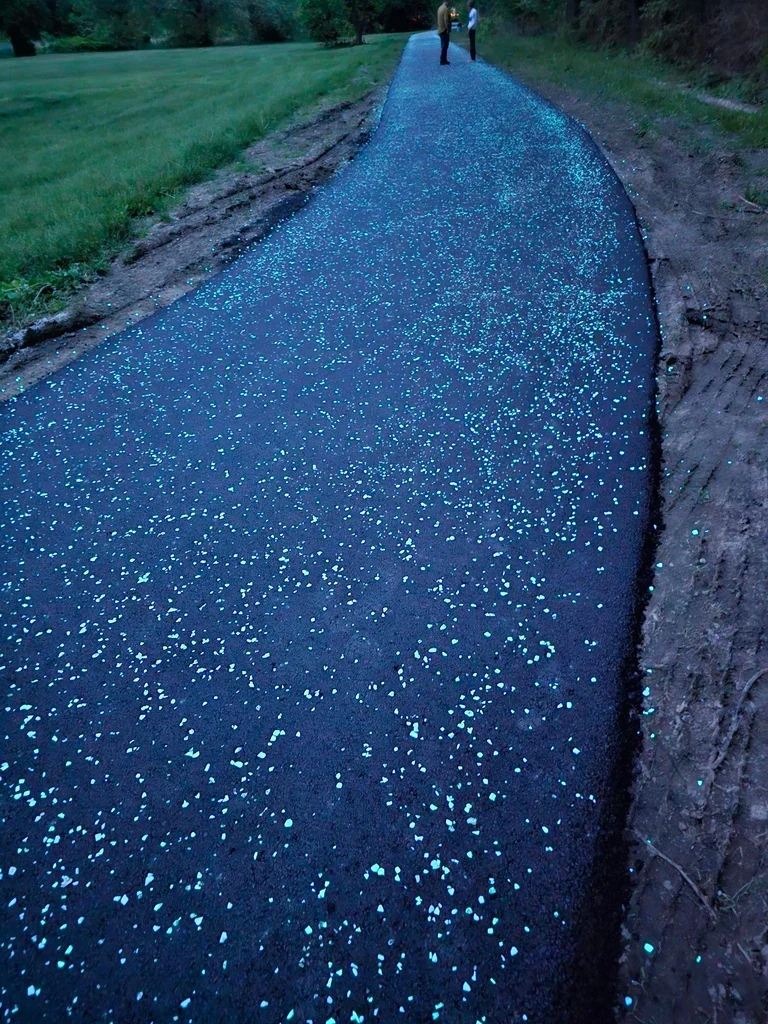
One effective strategy in low-light landscapes is to concentrate luminous aggregate along pathway edges.
Why?
Because the user mainly needs to understand:
Where does the path begin and end?
Continuous edge bands can create a clear corridor while keeping the center of the pavement visually quieter.
This can work well for:
-
scenic trails
-
waterfront paths
-
resort gardens
-
botanical parks
It also uses less material than dense full-surface coverage.
Full-Surface Glow Works Better as a Feature Zone
Full-surface luminous pavement can create a dramatic effect.
But it may not be necessary across an entire long trail.
Instead, it can be reserved for:
-
entrance areas
-
viewing platforms
-
landmark sections
-
plazas
-
rest areas
-
special landscape features
This creates contrast between ordinary path sections and important locations.
The result can feel more intentional than making every section equally bright.
Use Stronger Glow Where the Route Changes
The most useful luminous zones are often places where users need to make decisions.
Examples include:
-
curves
-
forks
-
crossings
-
entrances
-
exits
-
platform edges
These areas can use:
-
higher aggregate density
-
wider luminous bands
-
contrasting glow colors
-
directional symbols
This allows the material to function as part of the route design rather than simply as decoration.
Choose Glow Color for the Landscape
Different glow colors create different visual impressions.
Yellow-Green
Yellow-green is usually very noticeable in dark surroundings.
It can work well for:
-
route edges
-
entrances
-
guidance zones
-
high-visibility areas
Blue-Green
Blue-green creates a softer landscape effect while still remaining visible.
It works well for:
-
park trails
-
waterfront paths
-
resort walkways
-
public landscapes
Blue
Blue creates a cooler, more atmospheric appearance.
It is especially suitable for:
-
water-related landscapes
-
scenic overlooks
-
modern resorts
-
decorative zones
For a low-light environment, the color should be tested at the actual site rather than selected only from product photos.
Nearby Lighting Changes Perceived Glow
A glow surface that looks very bright in complete darkness can look much softer near:
-
pathway lamps
-
buildings
-
parking areas
-
roads
-
landscape spotlights
This is not necessarily a material problem.
It is a contrast problem.
The darker the surrounding environment, the more visible the luminous surface may appear.
That is why dark-sky and low-light projects can be particularly suitable for photoluminescent paving.
Test the Site at Night Before Finalizing the Design
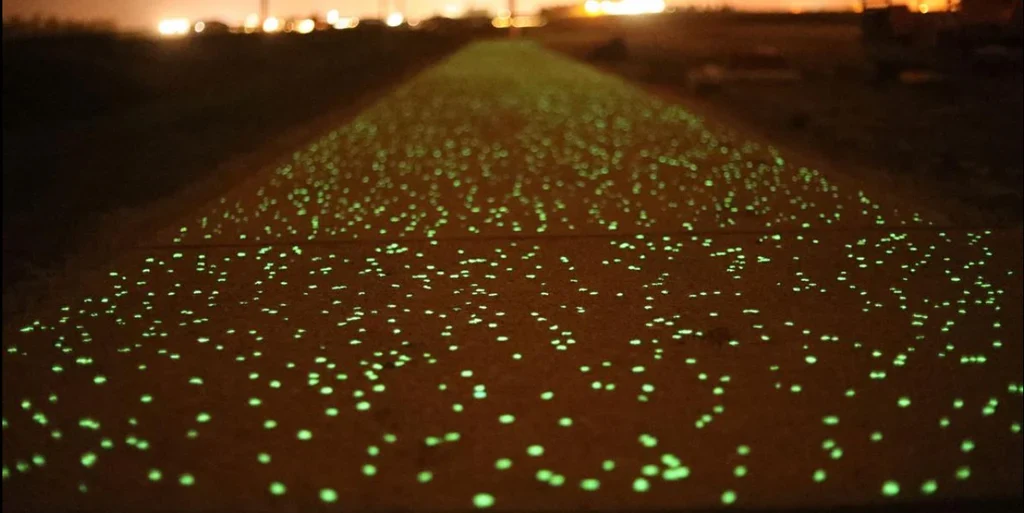
One of the most useful design steps is simple:
visit the site after dark.
Look at the actual environment.
Ask:
-
Where is it naturally dark?
-
Where are existing lamps located?
-
Which sections receive vehicle headlights?
-
Which curves are difficult to recognize?
-
Which areas already have enough light?
-
Where would luminous guidance be most useful?
This site inspection can help reduce unnecessary material use.
Daytime Charging Still Matters
A dark nighttime environment is helpful for visual contrast.
But the pavement still needs adequate charging conditions during the day.
Check whether the pathway is:
-
fully open
-
partially shaded
-
under dense tree cover
-
between tall buildings
-
inside covered areas
A heavily shaded trail may receive less daylight.
This can reduce nighttime performance.
For large projects, test samples in the actual daytime charging environment.
Forest Paths Need More Maintenance Planning
A forest path may be visually ideal for glow aggregate because the surroundings are dark.
But it also has more maintenance challenges.
Common issues include:
-
leaves
-
soil
-
pollen
-
moss
-
organic debris
These materials can cover luminous particles.
So when designing a photoluminescent forest path, maintenance should be planned from the beginning.
A route that cannot be cleaned easily may not maintain the intended effect.
Waterfront Paths Can Benefit From Surface-Level Guidance
Waterfront landscapes often aim for a calm nighttime atmosphere.
Strong lighting can create reflections and visual clutter.
Photoluminescent aggregate can be used to create:
-
edge bands
-
subtle surface patterns
-
entrance features
-
decorative route markers
The result is a softer visual layer integrated into the pavement.
Blue and blue-green tones are often visually compatible with waterfront environments.
Scenic Viewing Areas Can Use Concentrated Glow
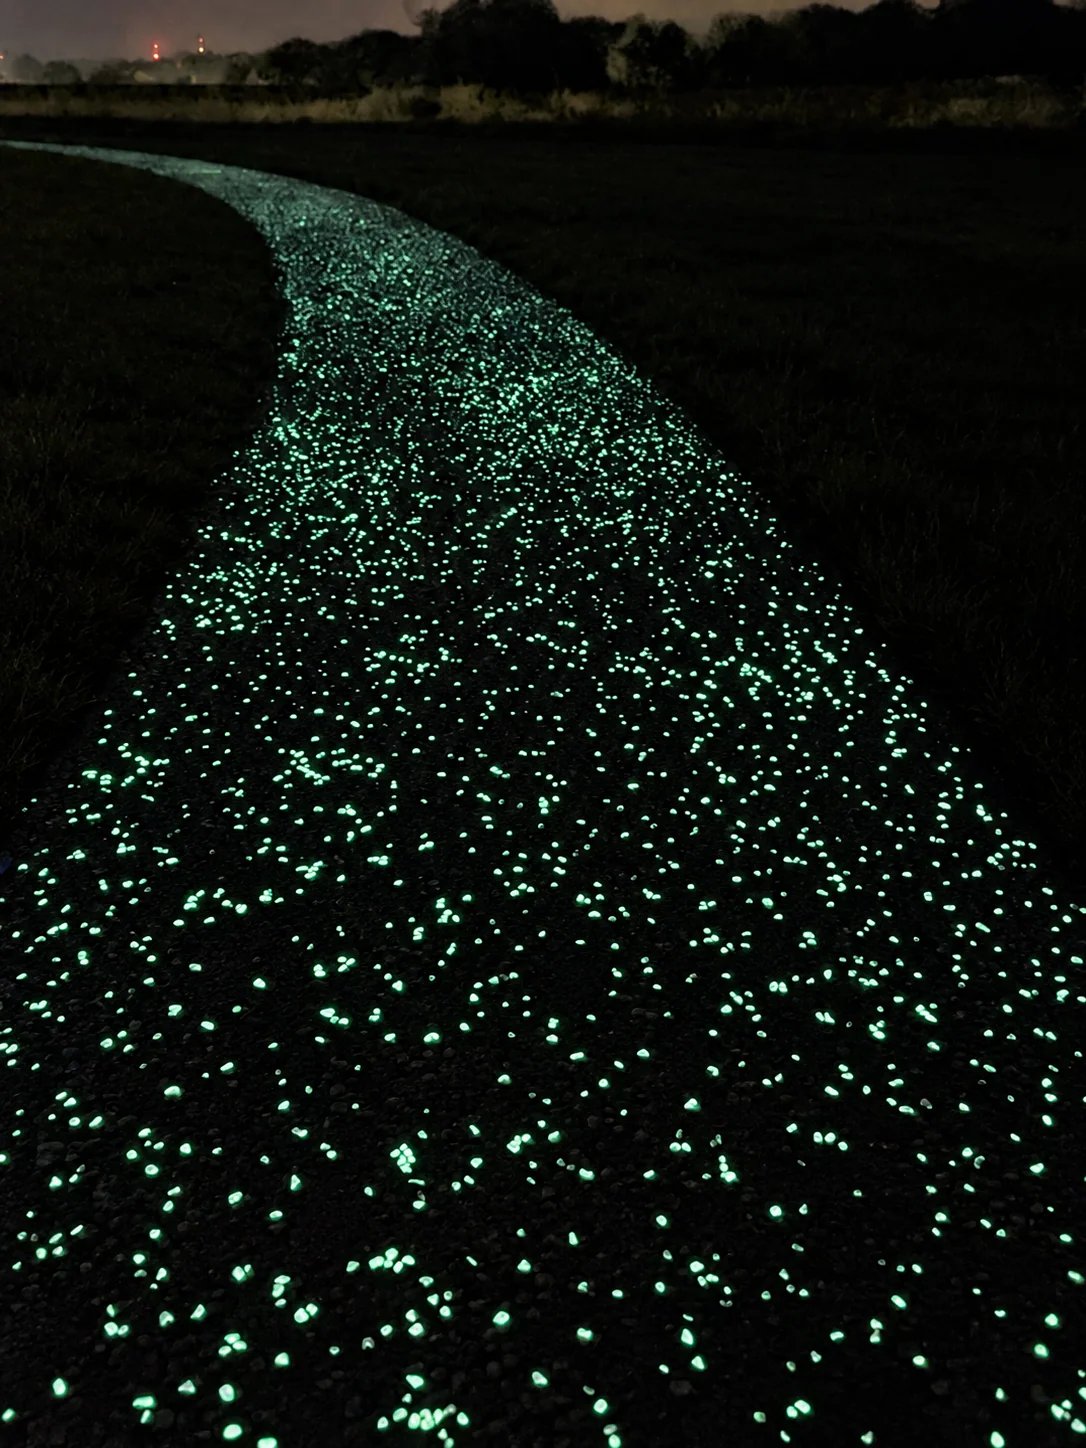
Viewing platforms and scenic overlooks are ideal places for stronger luminous treatment.
Instead of spreading high-density glow aggregate along the entire route, a project can concentrate the material around:
-
observation decks
-
seating zones
-
platform borders
-
special landscape elements
This improves visual impact without increasing material consumption across the full project.
Avoid Excessive Decorative Complexity
Low-light landscapes usually benefit from simple, readable patterns.
Too many:
-
colors
-
graphics
-
small symbols
-
complex patterns
can make the path look visually busy.
For scenic environments, simpler designs often work better:
-
narrow edge bands
-
scattered star-like points
-
larger symbols
-
soft curves
-
repeated route markers
The goal is to complement the landscape, not compete with it.
Particle Size Changes the Visual Character
1–5mm
Creates many fine glowing points.
Good for:
-
subtle star-like effects
-
decorative surfaces
-
finer patterns
5–10mm
Creates clearer individual luminous points.
Useful for:
-
general park trails
-
edge bands
-
pedestrian routes
10–20mm
Creates stronger, larger visual features.
Better for:
-
decorative borders
-
landscape accents
-
feature zones
For walking surfaces, larger particles should be integrated carefully so the finished pavement remains comfortable.
Background Pavement Color Matters
A dark pavement can create strong contrast.
A light concrete surface may create a different visual effect.
This should be considered together with:
-
daytime appearance
-
aggregate color
-
landscape materials
-
surrounding vegetation
For premium landscape projects, build a sample panel using the real pavement color before final approval.
A Small Test Section Is More Useful Than a Night Photo
Night photos can exaggerate glow because of:
-
long exposure
-
automatic night mode
-
increased ISO
-
image editing
For project approval, a real sample section is much more useful.
The project team should inspect it:
-
during the day
-
shortly after sunset
-
later at night
This shows how the system behaves under actual conditions.
Observe the Sample From Real Viewing Distance
Do not only kneel beside the test section.
Walk toward it from:
-
5 meters
-
10 meters
-
20 meters
Ask whether the path remains recognizable.
For long scenic trails, viewing distance can matter more than close-up brightness.
Combine Glow Aggregate With Minimal Lighting
Photoluminescent pavement and conventional lighting do not have to compete.
They can be used together strategically.
For example:
Low-level lights at:
-
stairs
-
entrances
-
crossings
-
hazardous areas
Glow aggregate along:
-
normal path sections
-
edges
-
landscape zones
This reduces the need for uniform high-intensity lighting everywhere.
Do Not Place Strong Lights Directly Over the Glow Surface Without Testing
If strong lamps are positioned directly over photoluminescent pavement, the glow may become difficult to notice.
This does not mean the aggregate has stopped working.
The surrounding light simply reduces visual contrast.
If glow appearance is important, test the lighting and pavement together.
Use Pattern Density to Control Visual Intensity
Not every project needs the same glow density.
Light Density
Best for:
-
scenic trails
-
subtle garden paths
-
natural landscapes
Medium Density
Best for:
-
park walkways
-
resort routes
-
waterfront paths
High Density
Best for:
-
entrance areas
-
landmarks
-
observation zones
-
decorative feature sections
This zoning approach can produce a more refined project.
Dark-Sky Projects Need Careful Safety Coordination
Preserving darkness should not mean ignoring safety.
Any public project still needs to consider:
-
local regulations
-
accessibility
-
route hazards
-
steps
-
intersections
-
emergency access
Photoluminescent pavement can support wayfinding, but it should be coordinated with the complete safety design.
A Practical Design Example
Imagine a 700-meter scenic park trail.
Instead of applying high-density glow aggregate everywhere, the project might use:
Straight sections
Light blue-green scattered aggregate
Curves
Higher-density yellow-green edge bands
Intersections
Larger directional luminous patterns
Viewing platform
High-density blue decorative surface
Entrance
Strong luminous feature zone
This creates a clear nighttime route while keeping the overall environment relatively dark.
Maintenance Should Be Part of the Specification
A low-light park may contain trees, soil and natural debris.
The maintenance plan should include:
-
leaf removal
-
surface cleaning
-
aggregate inspection
-
crack repair
-
keeping the luminous surface exposed
The best luminous design will not perform well if the surface becomes covered.
What Should Be Included in the Project Specification?
For a dark-sky or low-light project, specify:
-
application area
-
pavement substrate
-
glow color
-
particle size
-
density
-
pattern
-
sample approval
-
daytime charging conditions
-
maintenance requirements
This helps contractors price and install the system consistently.
Frequently Asked Questions
Is photoluminescent pavement suitable for dark-sky areas?
It can be useful because it provides a surface-level afterglow rather than projecting strong light into the environment. Project requirements and local standards should still be followed.
Does it work under trees?
It can, but reduced daylight exposure may affect charging. Test samples under actual site conditions.
Which glow color is best for nature trails?
Blue-green and yellow-green are common options, but the best choice depends on the surrounding environment and desired appearance.
Does the whole path need to glow?
No. Edge bands, curves, entrances and selected feature zones can often provide enough visual guidance.
Can glow aggregate replace pathway lighting?
It should not automatically replace lighting required for safety or regulation. It is better used as a passive visual guidance feature.
Should a test section be built first?
Yes, especially for large or scenic projects where appearance is important.
A Better Design Principle
For a low-light landscape, do not ask:
“How can we make the path as bright as possible?”
Ask:
“How little light can we use while still making the route clear?”
That question leads to a much more refined design.
Photoluminescent aggregate works particularly well when used as:
guidance rather than illumination
and
landscape integration rather than visual domination.
Final Thoughts
Photoluminescent pavement can be a useful design tool for dark-sky parks, scenic trails and low-light landscapes.
Its value comes from creating a visible surface without turning the entire surrounding environment into a brightly lit space.
The best projects consider:
route geometry + glow placement + particle size + color + charging conditions + ambient light + maintenance.
For larger projects, visit the site at night and build a real test section before final approval.
That allows the luminous pavement to support the landscape instead of competing with it.