
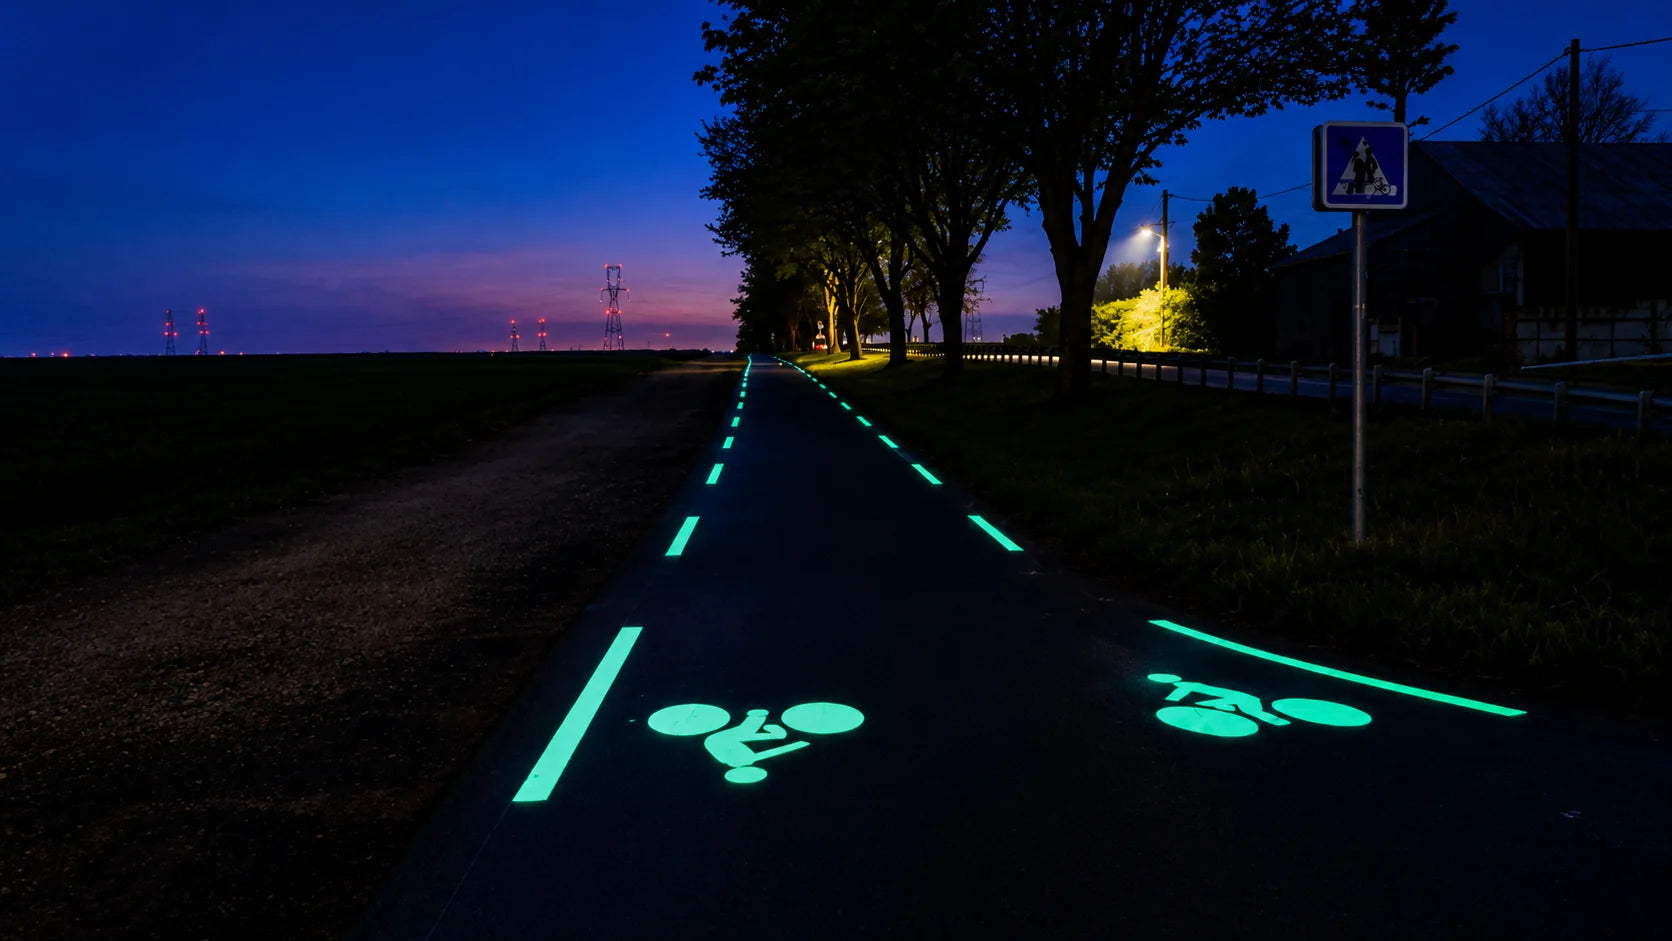
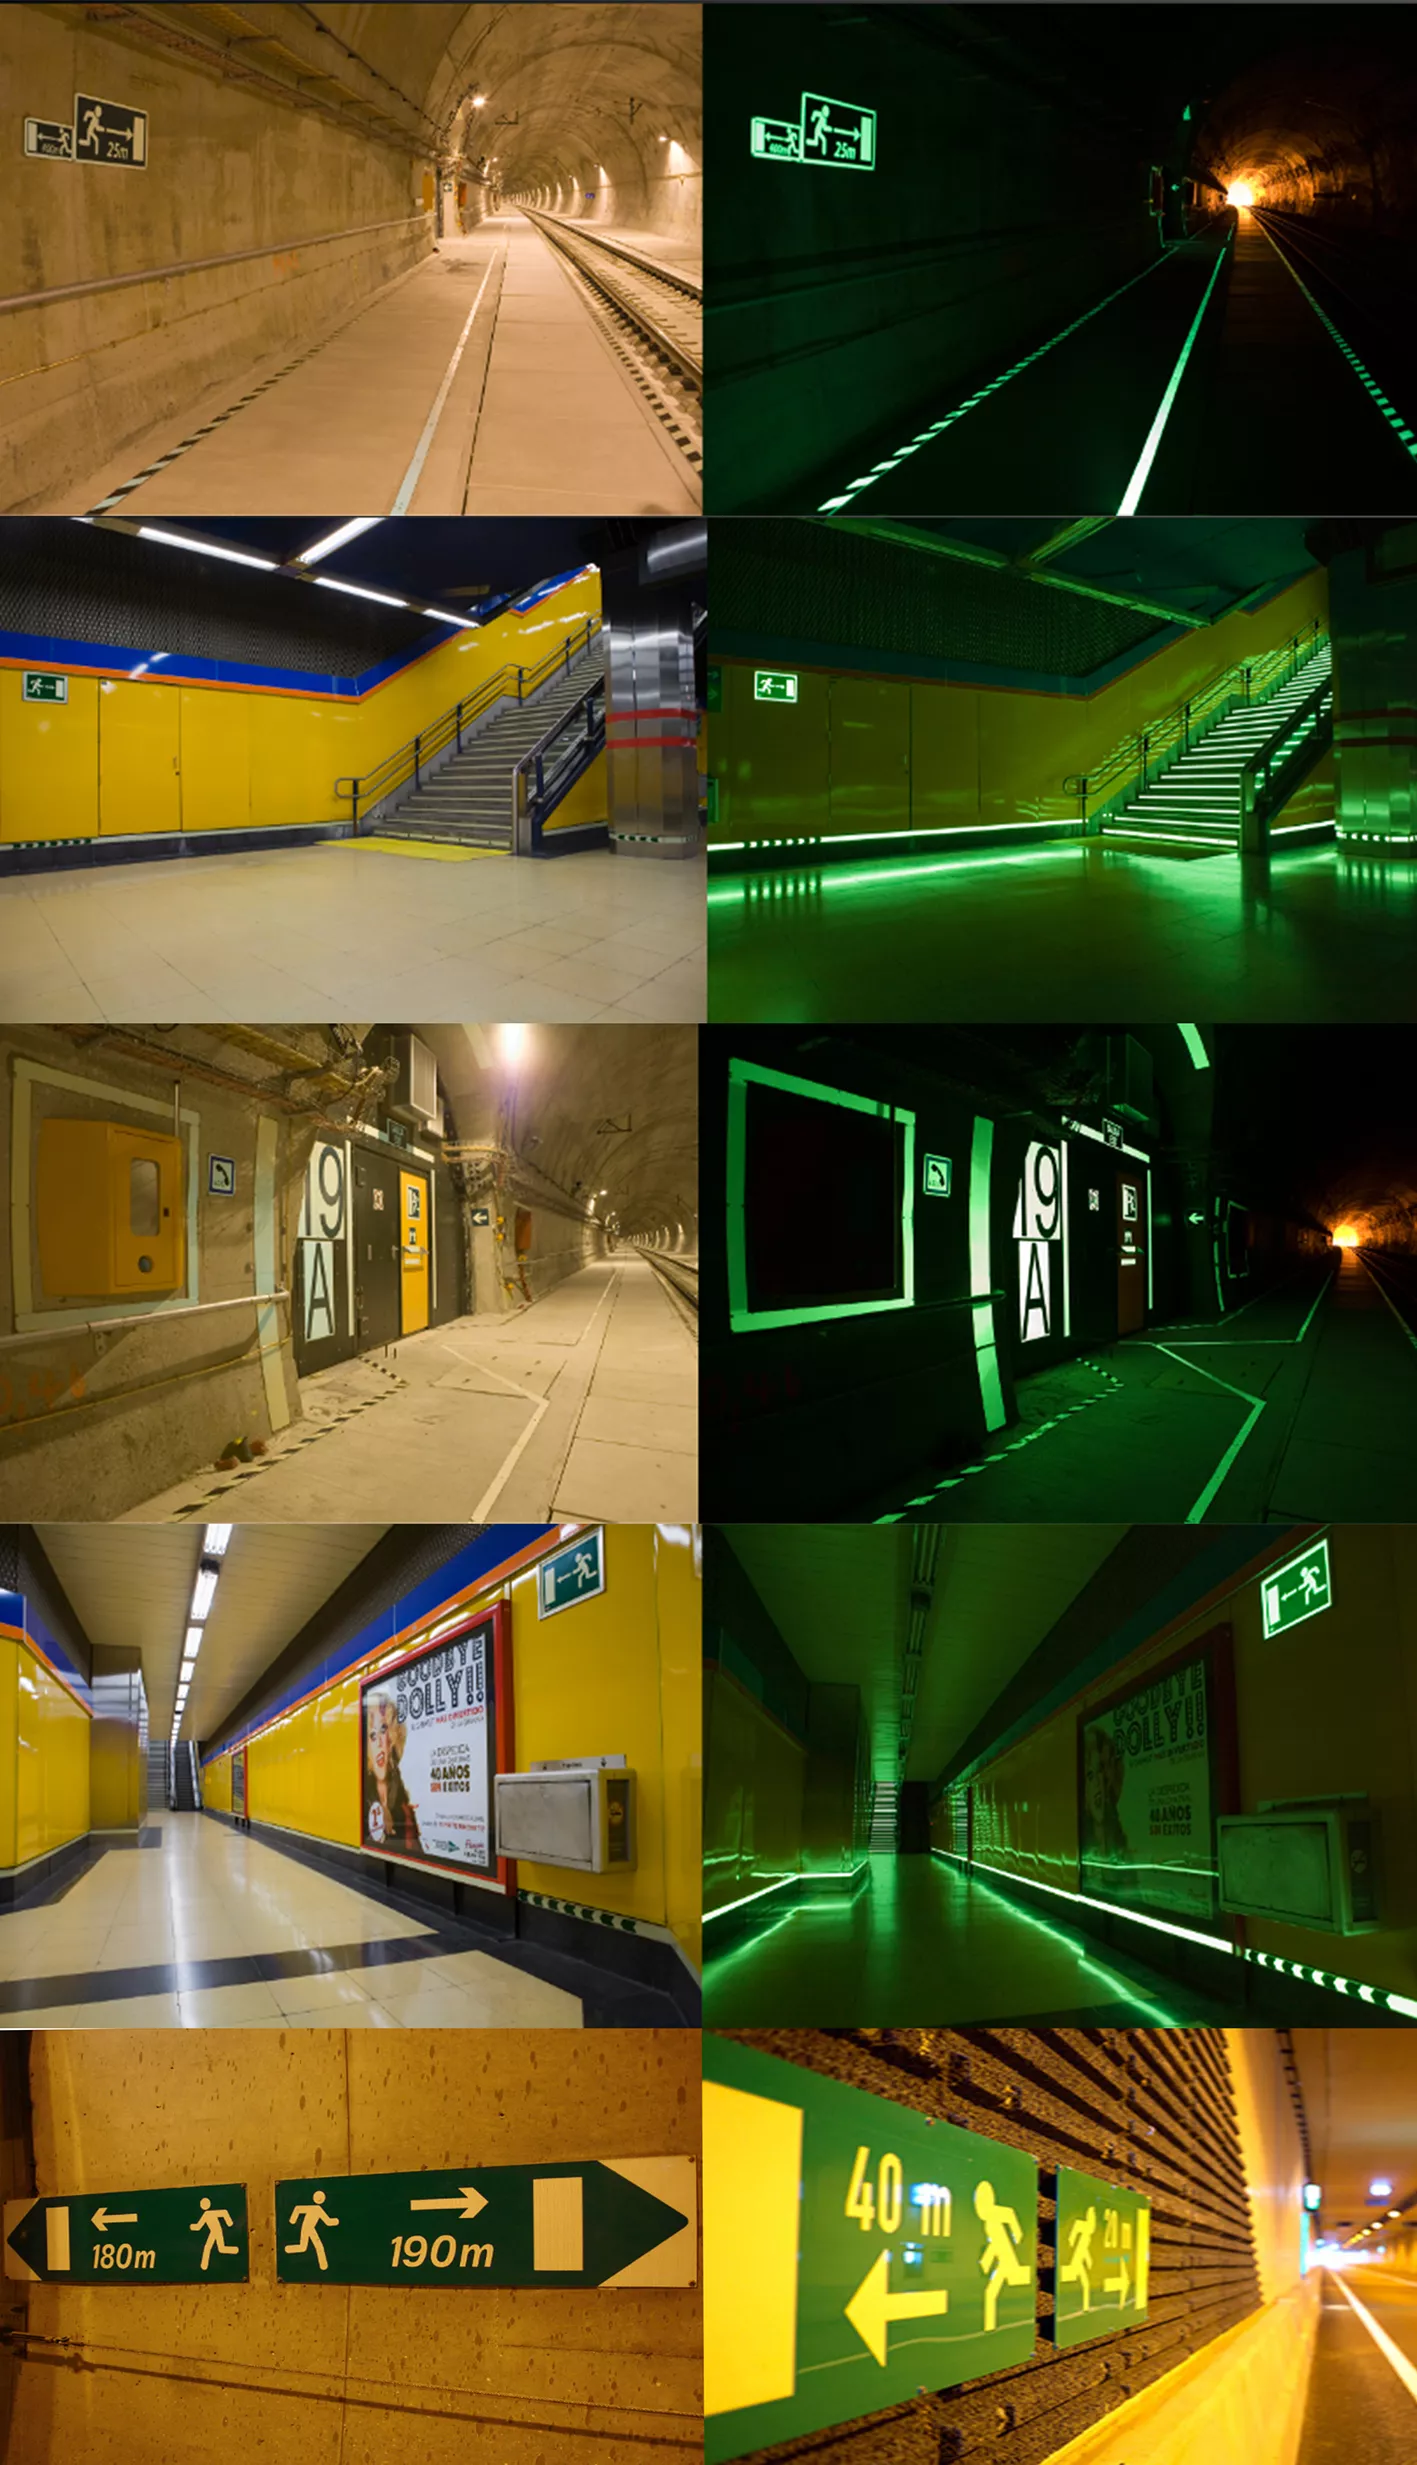
Luminous road marking for tunnels can add pavement-level guidance where daylight is limited, artificial lighting runs for long periods, road edges are difficult to distinguish and evacuation routes need clear identification.
Photoluminescent markings absorb energy from suitable tunnel lighting and gradually release visible afterglow as illumination decreases. Potential applications include selected lane guidance, road edges, pedestrian evacuation routes, emergency exits, maintenance passages and other low-level routes.
Evaluate the specific tunnel before choosing a system: charging conditions, vehicle traffic, contamination, safety requirements and maintenance can differ substantially from outdoor pavement.
How luminous tunnel markings work
Luminous tunnel marking generally refers to pavement or low-level markings containing photoluminescent material. The material works through a repeating cycle:
Artificial Light → Energy Absorption → Energy Storage → Afterglow → Recharge
During normal tunnel operation, suitable lighting can charge the photoluminescent material.
When illumination decreases, the stored energy is gradually released as visible light. This differs from conventional reflective markings, which need an external light source such as vehicle headlights to appear bright.
Assess tunnel conditions and charging light
A tunnel creates several special challenges:
- Limited natural daylight
- Dependence on artificial lighting
- Continuous vehicle traffic
- Exhaust and dust contamination
- Restricted escape routes
- Wet or humid conditions
- Limited visual reference points
These factors mean a luminous marking system should be designed specifically for the tunnel environment rather than copied directly from an outdoor road project.
Artificial Lighting Is the Main Charging Source
For most tunnel applications, artificial lighting is the most important source of charging energy. Performance depends on:
- Lamp type
- Light intensity
- Distance from the marking
- Exposure duration
- Position of the marking
- Shadowed areas
A marking directly under tunnel lighting may charge differently from one installed near a wall, behind equipment, or in a darker section. This is why real-site testing is essential.
Choose the guidance locations and layout
Road edge lines are one potential application. Photoluminescent material can be incorporated into selected edge guidance to make the road boundary easier to identify when illumination decreases. Possible locations include:
- Tunnel walls
- Road shoulders
- Emergency walkways
- Maintenance zones
For normal traffic operation, required conventional and reflective road markings should still be maintained according to applicable standards.
Lane Guidance
Selected luminous markings can supplement conventional lane lines. They may help emphasize:
- Lane boundaries
- Curves
- Lane transitions
- Tunnel entrances and exits
However, high vehicle traffic creates significant abrasion. The material system must be selected according to actual tire exposure.
Emergency Evacuation Routes
One of the most interesting tunnel applications is low-level emergency guidance. Photoluminescent markings can be considered along:
- Emergency walkways
- Escape routes
- Cross passages
- Emergency doors
- Refuge areas
Because the marking is positioned close to floor level, it can provide an additional visual reference when normal lighting conditions change. It should complement—not replace—required emergency lighting and evacuation systems.
Pedestrian Emergency Walkways
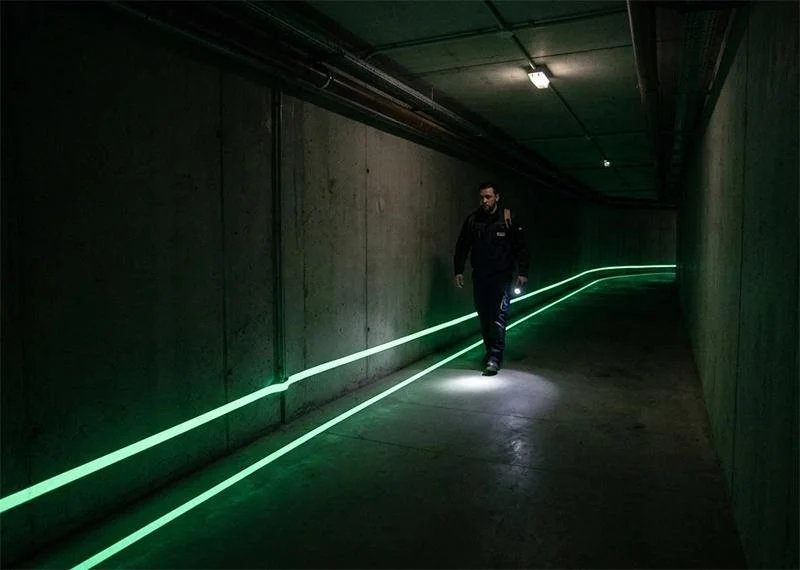
Many tunnels include raised or separated emergency walkways. A luminous line can be applied along:
- Walkway edges
- Wall bases
- Step transitions
- Direction changes
Continuous markings can make the route easier to follow than isolated luminous points.
Emergency Exit Arrows

Photoluminescent arrows can reinforce the direction toward emergency exits. Typical markings may include:
EXIT →
← EXIT
or universally recognized evacuation symbols where permitted.
The design should remain simple. Too many luminous graphics can reduce clarity.
Cross-Passage Guidance
Long tunnels may contain emergency cross passages connecting different tunnel tubes or protected spaces. Photoluminescent markings can be used to emphasize:
- Cross-passage entrances
- Floor routes
- Door boundaries
- Direction arrows
These markings can help make important locations more visually recognizable.
Wall and Floor Guidance Can Work Together
Tunnel guidance does not need to rely only on pavement markings. A coordinated system can combine:
- Floor-level luminous lines
- Wall-base markings
- Direction arrows
- Emergency exit indicators
This creates a continuous low-level visual route.
Tunnel Curves
Curved tunnel sections can reduce long-distance visibility. Continuous luminous edge guidance may help reinforce the shape of the route. This can be particularly useful around:
- Curves
- Lane transitions
- Emergency shoulders
Again, photoluminescent markings should be supplementary to required traffic systems.
Compare reflective, photoluminescent and LED systems
Reflective vs. Photoluminescent Tunnel Marking
These technologies work differently.
Reflective Marking
Reflects external light from:
- Vehicle headlights
- Tunnel lighting
It can provide strong visibility when illuminated.
Photoluminescent Marking
Stores light beforehand and releases visible afterglow when illumination decreases. The two technologies are not necessarily competitors. For some applications, they can complement each other.
Can Reflective and Luminous Functions Be Combined?
Depending on the marking system, reflective and photoluminescent properties may be incorporated into the same guidance strategy. The goal may be:
Normal Operation → Strong Reflective Visibility
Reduced Lighting → Supplementary Photoluminescent Afterglow
Any combined system should be tested because surface treatments, glass beads, aggregates, and topcoats can affect luminous performance.
Luminous Marking vs. LED Tunnel Guidance
LED systems actively produce light. Photoluminescent markings provide passive afterglow.
Photoluminescent Marking
- No electrical wiring needed for the afterglow itself
- Passive operation
- Can be integrated into floor or wall surfaces
- Brightness gradually decreases
LED Guidance
- Requires electrical power
- Produces active illumination
- Can maintain controlled brightness
- Requires electrical infrastructure and maintenance
Many tunnel projects may use powered lighting as the primary system and photoluminescent material as supplementary guidance.
Select compatible pigments, binders and base coats
Tunnel applications should consider:
- Afterglow performance
- Charging efficiency
- Binder compatibility
- Wear resistance
- Water resistance
- Cleaning resistance
- Surface adhesion
The brightest pigment sample is not automatically the best tunnel coating. The complete system matters.
Why Binder Transparency Matters
Photoluminescent particles need light to charge. An overly opaque binder can reduce the amount of light reaching the pigment. A suitable binder should balance:
Transparency + Adhesion + Durability + Water Resistance
The coating should also tolerate the tunnel maintenance environment.
White Base Coat
A light-colored base can improve the apparent brightness of many luminous coatings. A typical floor system may include:
Concrete Substrate
↓
Primer
↓
White Base Coat
↓
Photoluminescent Layer
↓
Transparent Protective Layer
The exact structure depends on the selected material system.
Match the system to the substrate and traffic
Concrete is common in tunnels. Before applying a luminous coating, check for:
- Moisture
- Dust
- Weak surface layers
- Oil
- Existing coatings
- Cracks
Surface preparation may include cleaning or mechanical treatment. Good adhesion is essential.
Asphalt Road Surfaces
If luminous material is used directly on asphalt traffic surfaces, the system must tolerate:
- Tire abrasion
- Heat
- Surface movement
- Oil contamination
- Heavy traffic
This is much more demanding than a protected emergency walkway. For this reason, the location of the marking is extremely important.
Emergency Walkway vs. Vehicle Lane
These two areas should not automatically use the same coating.
Emergency Walkway
Usually experiences relatively little mechanical wear.
Vehicle Lane
Experiences continuous tire abrasion and much higher mechanical stress. A luminous coating that performs well on a walkway may not be suitable for a high-traffic lane.
Account for contamination, moisture and traction
Tunnel surfaces can accumulate:
- Road dust
- Tire particles
- Exhaust residue
- Oil
- Dirt
These contaminants can block light from reaching the luminous material. As a result, charging performance may gradually decrease even if the pigment itself remains functional.
Cleaning Is Critical
Regular cleaning is particularly important in tunnel environments. Maintenance may include:
- Dust removal
- Washing
- Removing oil contamination
- Cleaning wall-base markings
- Inspecting protective coatings
A clean photoluminescent surface generally charges more effectively.
Water and Humidity
Some tunnels experience:
- Condensation
- Water seepage
- High humidity
- Wet pavement
The coating system should therefore provide suitable water resistance. Moisture conditions should also be considered before installation because damp concrete can affect adhesion.
Skid Resistance
Any luminous coating installed on a walking or traffic surface should maintain appropriate traction. This is particularly important on:
- Emergency walkways
- Steps
- Ramps
- Wet areas
Compatible anti-slip aggregate may be required. The system should balance:
Glow Performance + Skid Resistance + Durability
Retain required lighting and safety systems
Tunnel materials may be subject to strict safety and fire-performance requirements. This is particularly important for:
- Escape routes
- Wall coatings
- Emergency systems
- Enclosed infrastructure
Material selection should always consider applicable tunnel, transportation, building, and fire regulations. Photoluminescent products should not be assumed to meet a particular safety standard without appropriate documentation.
Can Luminous Markings Replace Tunnel Lighting?
No. Photoluminescent markings provide visual guidance but do not illuminate the tunnel environment. They cannot replace lighting required to see:
- Vehicles
- Pedestrians
- Obstacles
- Road hazards
- Tunnel equipment
They are best considered as supplementary guidance.
Can They Replace Emergency Lighting?
Not automatically. Emergency tunnel systems may have specific regulatory requirements for illumination, redundancy, signage, and evacuation. Photoluminescent markings can support these systems but should not be treated as an automatic replacement.
Test charging, afterglow and durability in the tunnel
Before large-scale installation, create a test section inside the tunnel. Use the actual:
- Concrete or asphalt
- Primer
- Base coat
- Photoluminescent coating
- Protective layer
Then charge the sample using the existing tunnel lights. Do not rely only on a powerful laboratory lamp.
Test Different Tunnel Locations
A single test point may not represent the entire tunnel. Test areas with different lighting conditions, such as:
- Directly under lamps
- Between lighting fixtures
- Near walls
- Emergency walkways
- Cross passages
This helps identify areas where charging may be weaker.
Observe Afterglow at Different Times
After charging, observe the marking at several intervals. For example:
- Immediately after lighting reduction
- 10 minutes later
- 30 minutes later
- 60 minutes later
This provides a more realistic picture of performance than judging only the initial brightness.
Test Cleaning Resistance
Because tunnel markings may require frequent cleaning, include cleaning in the trial. Check whether repeated cleaning affects:
- Surface texture
- Topcoat transparency
- Adhesion
- Glow performance
This is particularly important for long-term maintenance planning.
Test Before Full Installation
A practical tunnel trial should evaluate:
Charging + Afterglow + Adhesion + Skid Resistance + Cleaning + Water Resistance + Wear
Only after the complete system has been evaluated should large-scale installation be considered.
Tunnel applications at a glance
Photoluminescent marking can be particularly useful for:
Emergency Walkways
Continuous low-level route guidance.
Cross Passages
Highlighting emergency connections.
Exit Routes
Arrows and floor-level guidance.
Wall Bases
Continuous luminous route definition.
Maintenance Areas
Low-level identification of selected boundaries.
Selected Road Edges
Supplementary nighttime guidance where appropriate.
Plan inspections, cleaning and repairs
A tunnel luminous marking system should be inspected periodically. Check for:
- Dirt accumulation
- Wear
- Peeling
- Reduced glow
- Topcoat damage
- Water-related problems
Small defects should be repaired before they become larger.
Select a tunnel guidance system using site tests
Luminous road marking for tunnels can provide useful supplementary visual guidance in one of the most challenging low-light transportation environments. Its most promising applications include:
- Emergency walkways
- Exit routes
- Cross passages
- Wall-base guidance
- Selected lane and edge markings
However, tunnel performance depends heavily on the complete system:
Artificial Charging Light + Photoluminescent Material + Correct Substrate Preparation + Durable Binder + Skid Resistance + Cleaning + Maintenance
The most important step is to test the material under the actual tunnel lighting and environmental conditions before large-scale installation.
Photoluminescent markings should complement required tunnel lighting, reflective markings, emergency signage, and evacuation systems rather than automatically replace them.
FUXIN supplies Photoluminescent Pigments, Luminous Road Marking Materials, Glow-in-the-Dark Pavement Coatings, and Low-Level Guidance Materials for tunnels, parking garages, pedestrian routes, industrial facilities, and other low-light applications.
For samples, quotations, or tunnel project material recommendations, please contact us.