
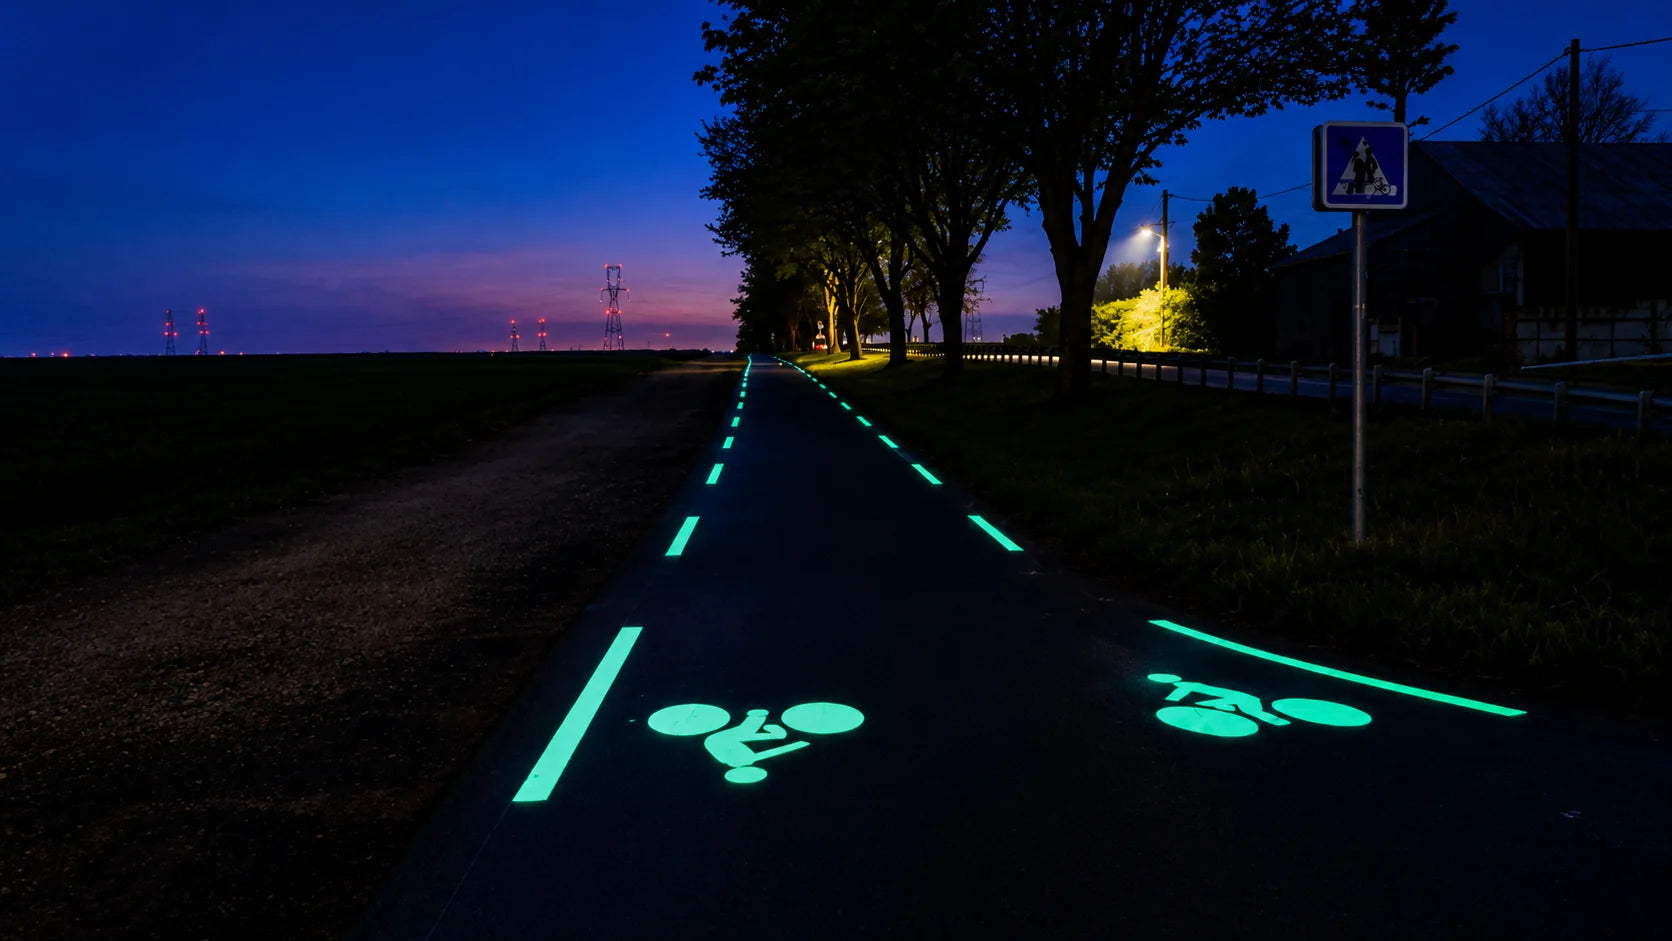
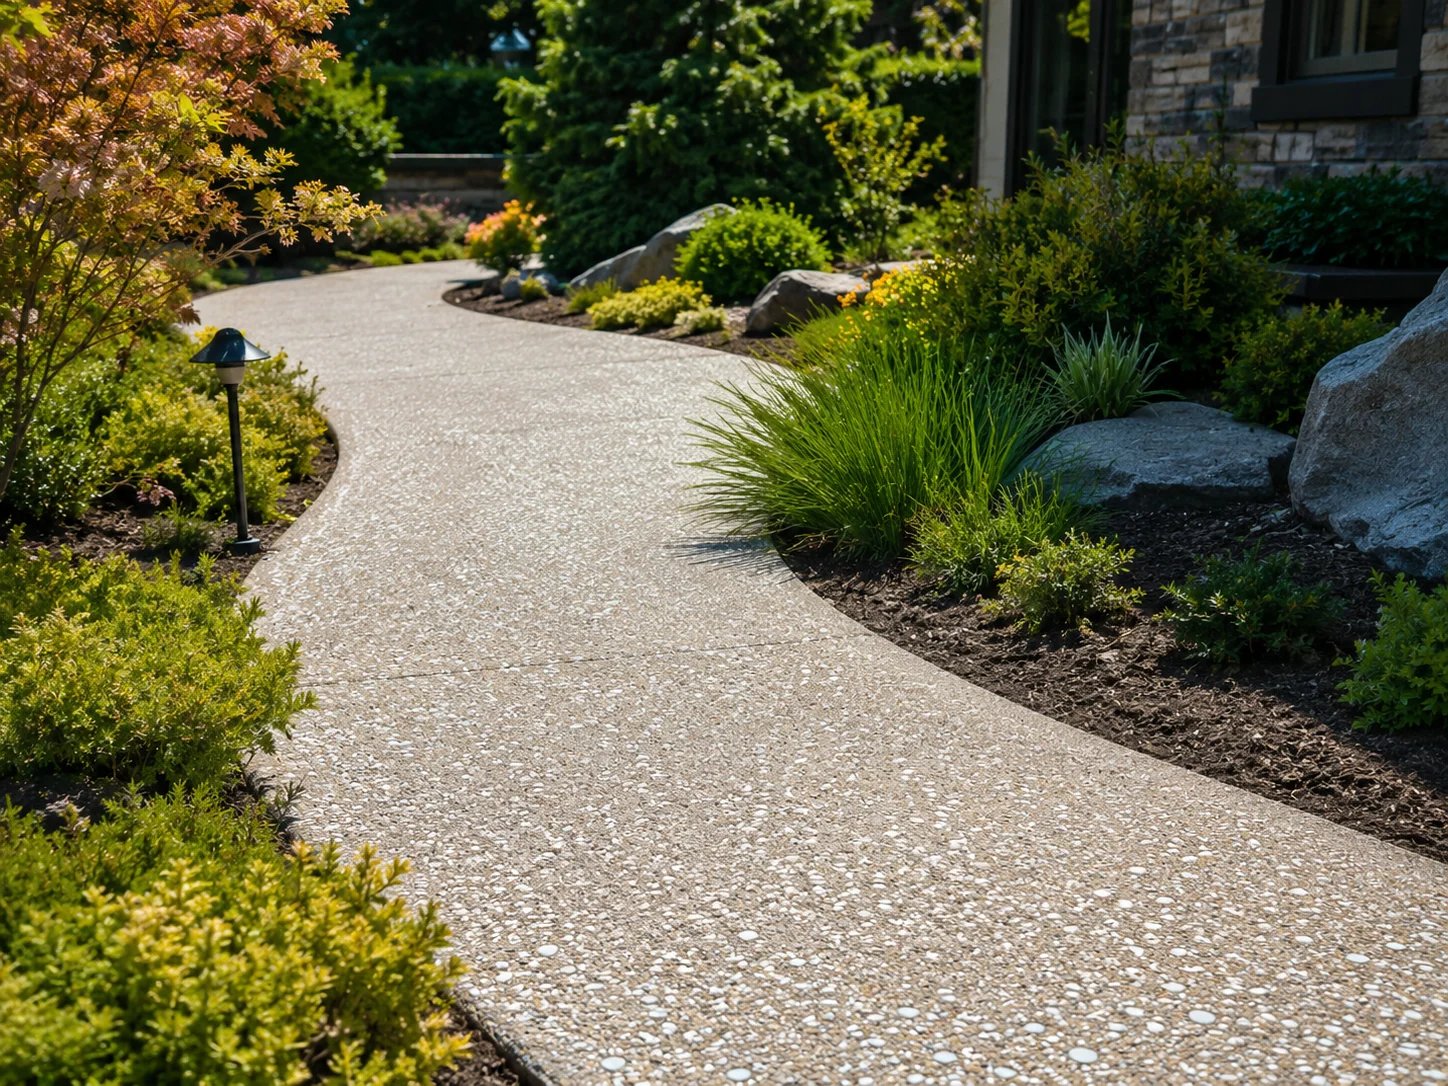
Installing photoluminescent aggregate in concrete pathways requires a balance between secure embedment and an exposed luminous surface. Stone position, embedment depth, even distribution and access to light can make two paths using the same aggregate look different after dark.
For contractors, landscape designers and project buyers, plan particle size, concrete preparation, surface broadcasting, finishing and curing before ordering material. Use a small installed test section to check the complete system in daylight and at night, helping avoid weak glow, loose stones and unnecessary material waste.
Understand light absorption and exposed aggregate
Photoluminescent aggregate absorbs energy from sunlight or artificial light and gradually releases that energy after the surrounding environment becomes dark.
For this process to work efficiently, the luminous particles need sufficient exposure.
If too much aggregate is buried deep inside the concrete, it may still be physically present, but it contributes very little to the visible nighttime effect.
That leads to a basic installation principle:
Keep the aggregate securely embedded while leaving enough of its upper surface exposed.
This balance affects both durability and glow performance.
Choose the Right Particle Size
Before construction begins, choose the particle size based on the desired surface appearance.
1–5mm
Fine particles create a denser distribution of small luminous points.
This size is suitable for:
- decorative concrete
- fine-textured pathways
- dense glow effects
- smaller landscape areas
Because there are more particles per unit area, the finished surface can look more evenly distributed.
5–10mm
This is a practical middle size for many concrete pathways.
The stones are large enough to remain visually noticeable but small enough to distribute evenly.
It works well for:
- pedestrian pathways
- garden walks
- courtyards
- parks
- landscape paving
10–20mm
Larger particles create a stronger individual stone effect.
They are better suited to:
- decorative landscape features
- borders
- exposed aggregate designs
- larger visual accents
For normal pedestrian pathways, 1–5mm or 5–10mm is often easier to integrate into the surface.
Prepare the Concrete Base Correctly
Photoluminescent aggregate cannot compensate for poor concrete work.
Before adding the glow material, the base concrete should be placed, leveled and finished according to the requirements of the project.
Pay attention to:
- correct concrete thickness
- stable subbase
- drainage
- slope
- joint layout
- surface level
- curing conditions
For outdoor pathways, drainage is particularly important.
Standing water, poor base preparation or cracking problems should be solved at the pavement-system level rather than relying on the glow aggregate.
Broadcast the Aggregate While the Surface Is Workable
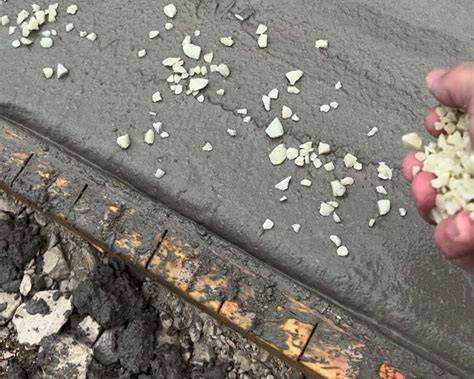
For many concrete pathway projects, a practical approach is to distribute the glow aggregate over the upper surface while the concrete is still workable.
The aggregate should be spread as evenly as possible.
Avoid creating:
- large empty areas
- excessive piles
- uneven concentration
- thick clusters that are difficult to embed
For large areas, divide the pathway into manageable sections so the distribution remains consistent.
The goal is not simply to use more material.
The goal is to create an even visible luminous surface.
Balance secure embedment with surface exposure
This is one of the most important installation stages.
After broadcasting, the stones need to be pressed into the concrete sufficiently to create good mechanical anchoring.
However, pressing them too deeply can dramatically reduce their visible glow.
Think of the stone as having two functions:
The lower part provides anchoring.
The upper part receives and releases light.
If nearly the entire particle disappears below the cement paste, the glow performance may be weaker.
If the stone sits completely loose on top, it may detach during use.
The ideal result is a partially embedded aggregate with enough exposed surface remaining visible.
Avoid Covering the Glow Surface With Cement Paste

During final finishing, concrete paste can sometimes move across the top of the glow aggregate.
If the luminous surface becomes covered, the finished pathway may look much weaker at night.
This is especially important with smaller particles.
Contractors should avoid excessive finishing that completely hides the aggregate.
For exposed-aggregate-style finishes, the surface treatment method should be selected carefully so the luminous particles remain visible without damaging the pavement.
Control the Distribution Density
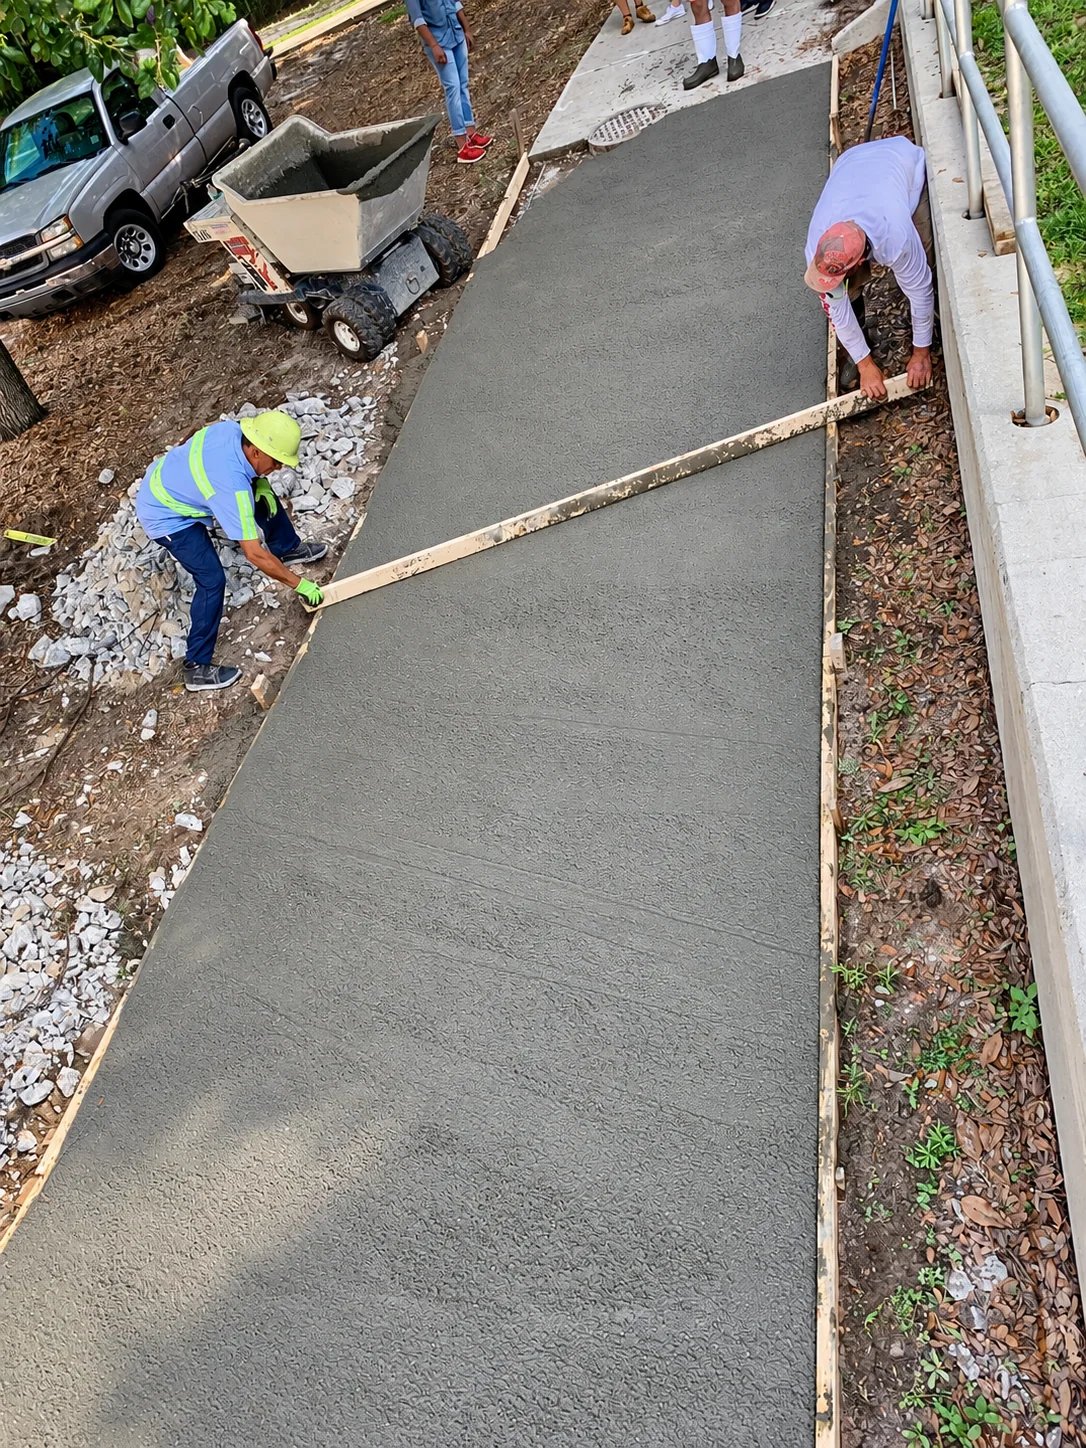
More aggregate does not automatically mean a better pathway.
There are usually several possible design styles.
Light Scatter
Small amounts of aggregate are distributed randomly across the concrete.
This creates a subtle “starry” appearance.
It works well for decorative residential gardens.
Medium Density
More glow stones are distributed across the surface while normal concrete remains clearly visible.
This is useful for:
- pedestrian paths
- resorts
- parks
- courtyards
High Density
A large portion of the visible surface contains luminous aggregate.
This creates a stronger nighttime effect but requires more material and more careful installation.
Before choosing a density, ask:
Does the project need decoration, guidance or maximum visual impact?
The answer changes the material consumption.
Test the actual concrete color with the aggregate
The color of the concrete can change how the finished luminous surface looks.
Light gray, beige and lighter concrete backgrounds usually create a clean daytime appearance.
Darker surfaces can increase nighttime contrast but may create a very different visual style.
For large commercial projects, it is useful to make a small sample with the actual:
concrete color + glow color + particle size + application density.
This gives a more realistic result than testing loose stones alone.
Choose the Glow Color Based on the Project
The most common options include blue, blue-green and yellow-green.
Blue
Creates a cooler, more decorative appearance.
Common applications include:
- pools
- modern gardens
- resorts
- landscape features
Blue-Green
Offers a balance between visual visibility and decorative appearance.
It works particularly well for general pathways and landscape paving.
Yellow-Green
Usually appears more noticeable in dark environments.
It can be useful where stronger nighttime recognition is preferred.
For mixed-color designs, avoid adding too many colors without a clear layout.
One or two coordinated glow colors often create a cleaner professional result.
Let the Concrete Cure Properly
After installation, the concrete still needs normal curing.
Do not judge the final system only immediately after placement.
The pavement needs time to achieve the required strength.
Traffic should only be allowed according to the requirements of the concrete system.
During curing, avoid damaging or contaminating the exposed luminous aggregate.
Once the pavement is ready, clean the surface so that dust, cement residue or construction debris does not block the visible glow stones.
Test the Pathway Under Real Lighting Conditions
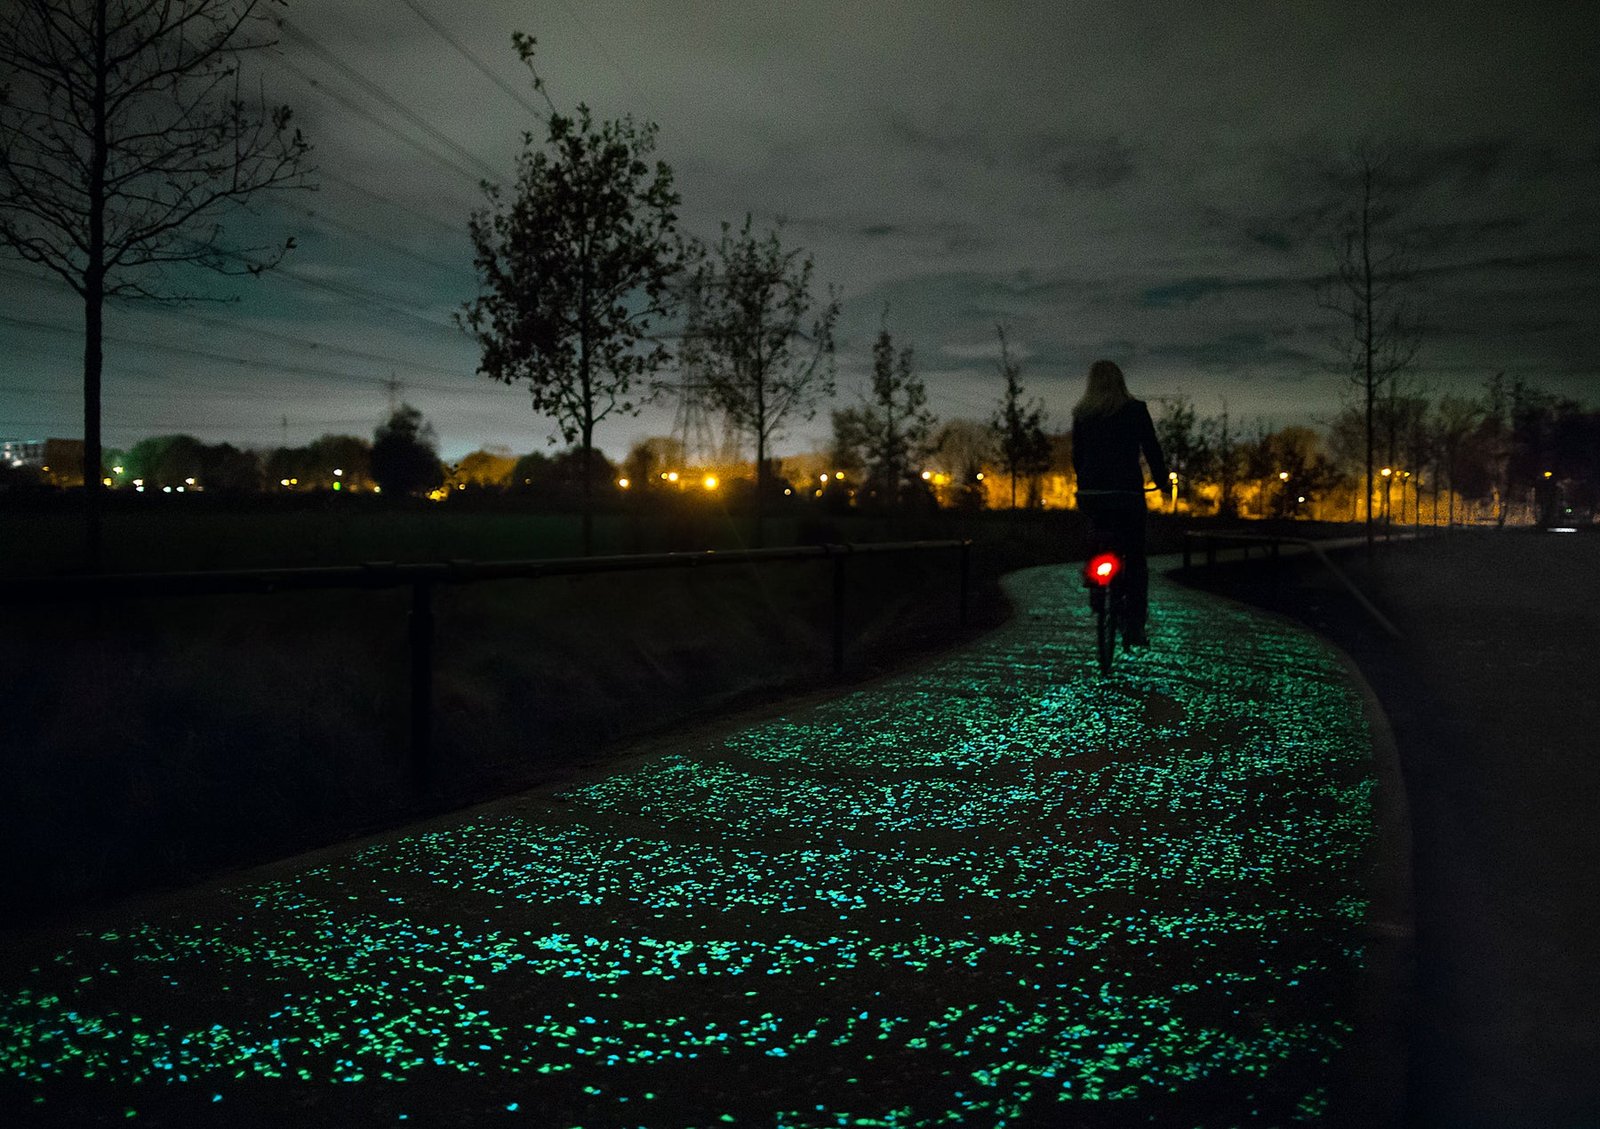
The first nighttime inspection should be done after the surface has received enough light.
For a useful comparison:
Step 1: Allow the pathway to receive normal daylight.
Step 2: Observe the surface shortly after sunset.
Step 3: Check it again after 30–60 minutes.
Step 4: Evaluate whether the distribution looks even.
Step 5: Identify areas where stones may have been buried or applied too sparsely.
This type of inspection gives much more useful information than shining a flashlight on one small area and immediately taking a photo.
Common Installation Mistakes
Burying Too Much Aggregate
The material is present, but not enough surface remains exposed.
Result: weaker visible glow.
Leaving Aggregate Too Loose
The stones look bright initially but may detach during use.
Result: poor durability.
Uneven Broadcasting
Some areas glow strongly while others look almost empty.
Result: inconsistent appearance.
Using Too Much Cement Paste During Finishing
The luminous particles become covered.
Result: reduced light exposure.
Ignoring the Charging Environment
A pathway under dense trees may receive much less sunlight than an open plaza.
Result: the same material produces different nighttime performance.
Make a Test Section Before a Large Project
For larger outdoor paving projects, we strongly recommend making a small installed sample first.
A test panel can help confirm:
- glow color
- particle size
- application density
- concrete color
- aggregate embedment
- surface texture
- nighttime appearance
For example, a contractor could compare:
1–5mm Blue-Green
5–10mm Blue-Green
5–10mm Yellow-Green
under the same concrete and lighting conditions.
This quickly shows which combination works best for the actual project.
Judge material efficiency by visible luminous surface
From a material-use perspective, one of the most important ideas is:
The goal is not to put the maximum amount of glow aggregate into the concrete. The goal is to keep the right amount visible at the surface.
Consider two pathways.
One uses more luminous aggregate, but much of it is buried below the surface.
Another uses slightly less material, but the particles are evenly distributed and correctly exposed.
The second pathway may produce a better nighttime effect.
This is why material quantity and installation method should always be considered together.
Frequently Asked Questions
Can photoluminescent aggregate be mixed directly into concrete?
Yes, but aggregate located deep inside the concrete contributes very little to the visible glow. For luminous surfaces, concentrating material near the upper layer is usually more efficient.
What particle size is best for concrete pathways?
1–5mm creates a finer, denser appearance, while 5–10mm gives a more visible individual aggregate effect. The best choice depends on the project design.
Does glow aggregate need electricity?
No. Photoluminescent aggregate absorbs available light and gradually releases it after dark.
Can different sizes be mixed?
Yes. Combining different particle sizes can create a more natural-looking surface, but a small sample should be tested before full installation.
Can blue and yellow-green glow stones be mixed?
Yes, although one dominant color plus a secondary color usually looks cleaner than mixing many colors randomly.
How much glow aggregate should be used?
There is no single quantity that fits every project. Consumption depends on particle size, surface density, installation method and the desired nighttime effect.
Test the complete concrete pathway before full installation
Installing photoluminescent aggregate in concrete pathways is not simply a matter of scattering glowing stones across fresh concrete.
Good results depend on:
particle size + distribution + embedment depth + surface exposure + concrete color + charging conditions
When these factors are coordinated correctly, the same amount of material can produce a much better finished result.
For larger projects, always test a small area first.
A real test section allows contractors and buyers to evaluate the system during the day and at night before committing to the full installation.