
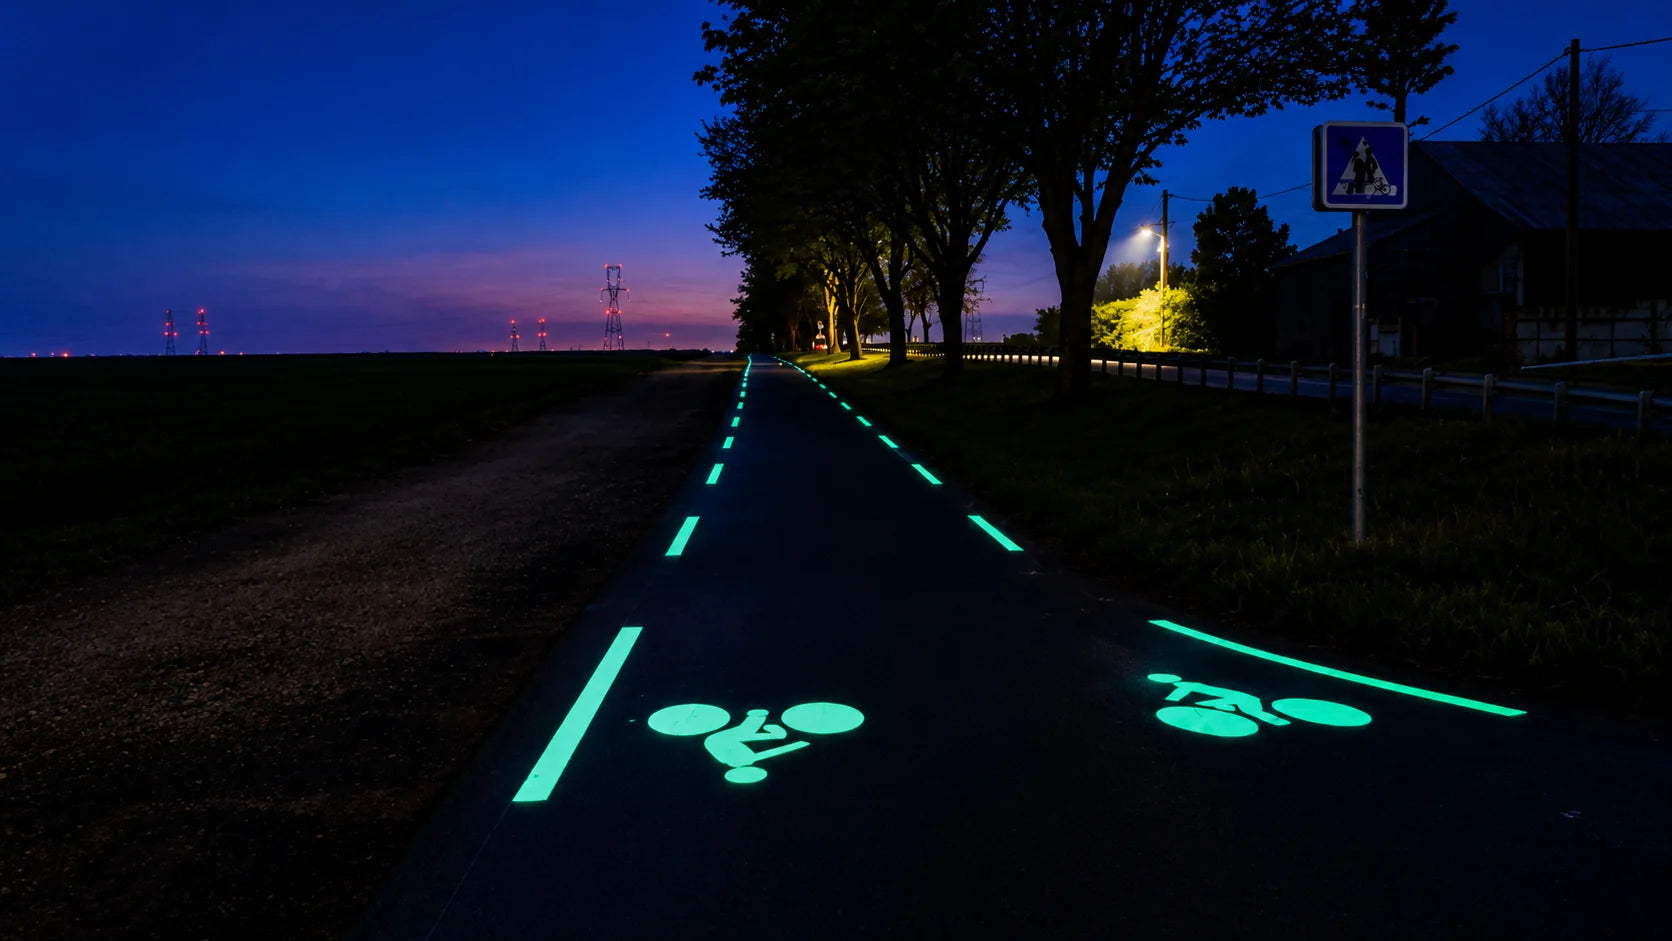
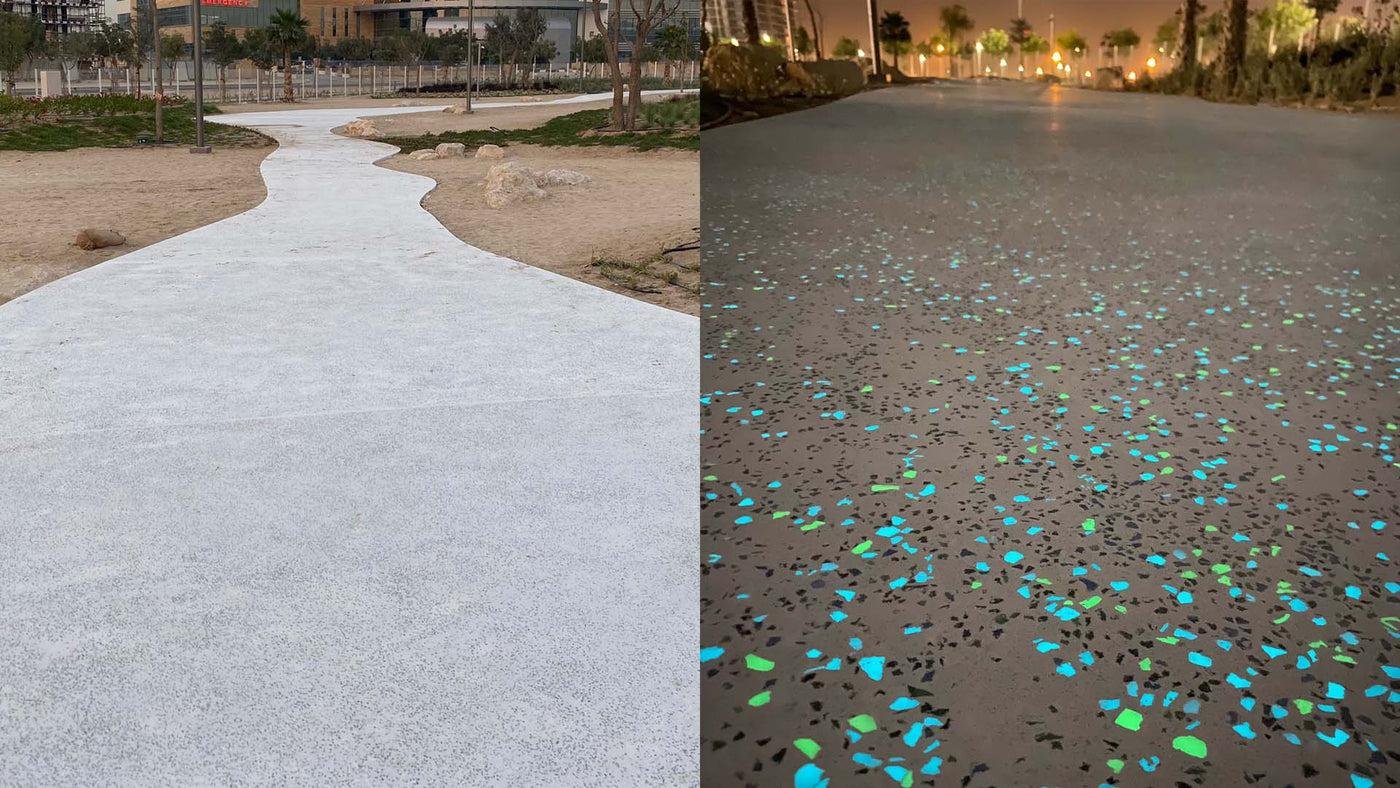
A photograph of a glowing pathway can look impressive.
But one photograph cannot tell you whether a photoluminescent pavement system is actually suitable for a project.
Night photography can change dramatically depending on:
- camera exposure
- ISO settings
- phone night mode
- surrounding darkness
- charging conditions
- editing
For contractors, designers and project buyers, the real question should not be:
“Which sample looks brightest in a photo?”
A better question is:
“How does the material perform under controlled and realistic project conditions?”
Evaluating photoluminescent pavement correctly requires more than looking at the initial glow.
You need to consider charging, afterglow, contrast, particle exposure, distribution and the actual environment where the pavement will be installed.
Start With the Charging Conditions
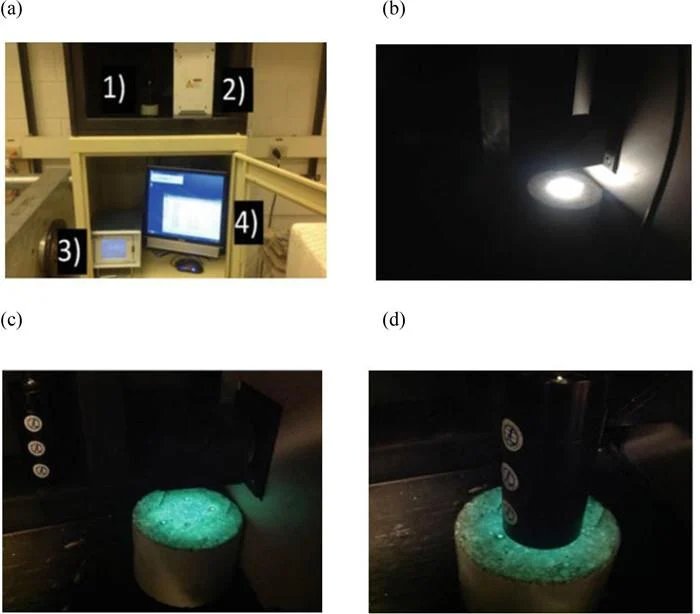
Photoluminescent materials need light exposure before they can produce an afterglow.
That means every comparison should begin with the same charging conditions.
If one sample receives strong sunlight and another is only exposed to weak indoor lighting, the comparison is not meaningful.
For a fair test, keep the following conditions consistent:
- light source
- charging duration
- distance from the light
- sample position
The goal is to remove unnecessary variables.
Daylight and Artificial Light Can Produce Different Results
A pavement installed outdoors may receive:
- direct sunlight
- indirect daylight
- cloudy daylight
- artificial lighting
These conditions are not identical.
A sample that performs well after strong UV exposure may behave differently when installed under:
- dense trees
- covered walkways
- tall buildings
This is why large projects should test the material under the actual site environment whenever possible.
Initial Brightness Is Only One Part of Performance
Immediately after charging, many photoluminescent materials can look very bright.
But that first moment does not represent the entire nighttime experience.
Afterglow gradually decreases.
So a useful evaluation should observe the material at several stages.
For example:
Immediately after charging
Shows initial brightness.
After a short period
Shows early decay.
Later in the evening
Shows how much visible glow remains.
A material should not be judged only by the first few seconds after the lights are turned off.
Compare Samples at the Same Time
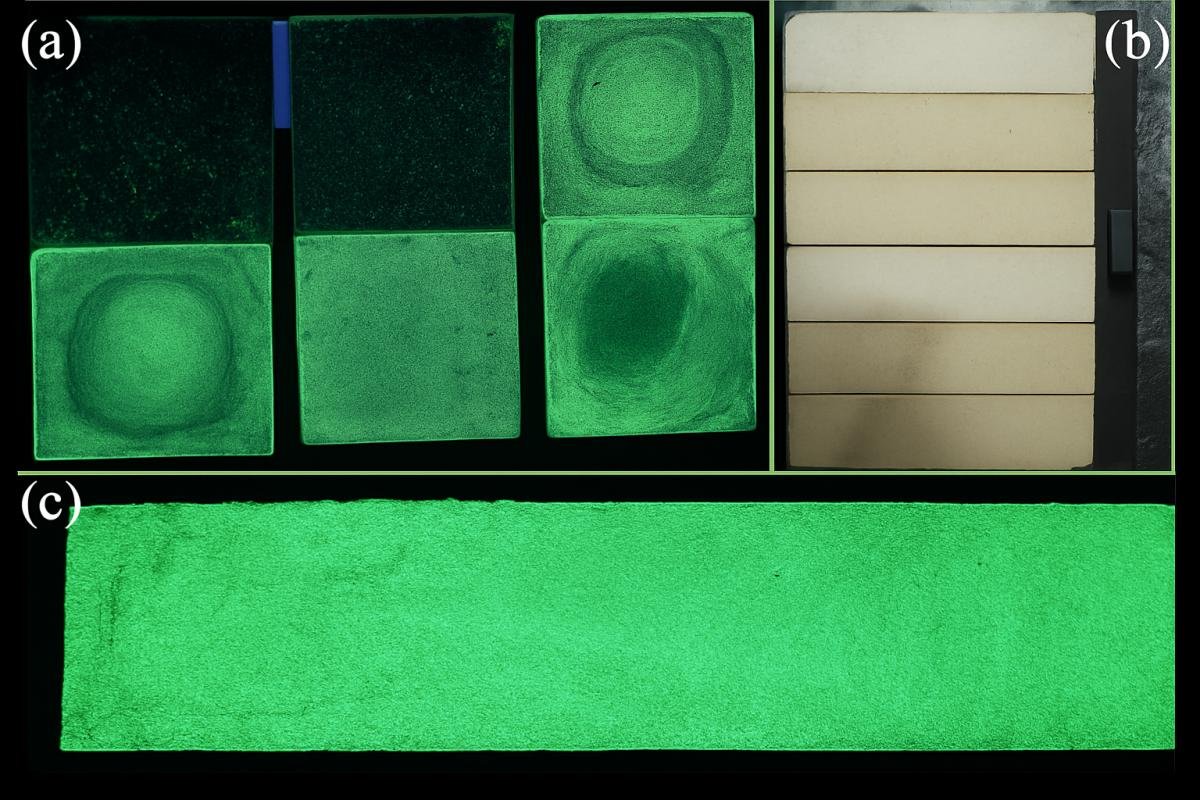
Suppose Sample A is photographed one minute after charging.
Sample B is photographed thirty minutes later.
The two images cannot be compared fairly.
Always compare samples:
- at the same time
- under the same darkness
- after the same charging process
This is especially important when evaluating several suppliers.
Surface Exposure Can Change the Result More Than the Material
One of the most important factors is how much luminous material remains visible at the surface.
A high-quality glow aggregate can appear weak if most of it is buried inside:
- concrete
- asphalt
- resin
The particle must be securely fixed, but enough surface area should remain exposed.
This creates the correct balance:
secure embedment + sufficient visible surface
If the particles are too deep, the problem may be installation rather than material quality.
Test Loose Stones and Installed Samples Separately
Loose glow stones may look excellent in a container.
But a pavement is very different.
After installation:
- part of the particle may be buried
- concrete color changes contrast
- resin may cover the surface
- aggregate spacing changes
That means buyers should test two things:
Loose material
to evaluate the raw product.
and
Installed sample
to evaluate the actual pavement system.
The installed sample is usually more useful for project approval.
Background Color Affects Perceived Brightness
Contrast strongly affects how bright a luminous surface appears.
The same glow aggregate may look very different on:
- black asphalt
- gray concrete
- red pavement
- light resin-bound stone
A dark background often creates stronger visual contrast.
A lighter background may produce a softer appearance.
For this reason, sample testing should use the actual or similar project substrate whenever possible.
Ambient Lighting Can Make Good Material Look Weak
A photoluminescent pavement in complete darkness can look extremely visible.
The same surface beside strong streetlights may appear much softer.
This does not necessarily mean the material is performing poorly.
The human eye is responding to contrast.
Important nearby light sources include:
- streetlights
- building lights
- vehicle headlights
- landscape lighting
- commercial signs
When evaluating a project, test the surface in the real nighttime environment.
Distance Matters
A close-up photograph may show hundreds of glowing particles.
But users do not always view the pavement from 30 centimeters away.
A pedestrian may see it from several meters.
A cyclist may need to recognize the route from much farther away.
Therefore, test the pavement at realistic viewing distances.
For example:
- close range
- walking distance
- longer route-viewing distance
Ask:
Can the route still be recognized?
That is more useful than asking whether individual stones look bright in a close-up photo.
Particle Size Changes Visual Perception
Different particle sizes create different nighttime appearances.
Small Particles
Create:
- many fine luminous points
- smoother visual distribution
- detailed patterns
Suitable for:
- decorative surfaces
- smaller graphics
- fine landscape designs
Medium Particles
Create:
- stronger individual glow points
- balanced distribution
Suitable for:
- pathways
- parks
- bike routes
Large Particles
Create:
- highly visible individual points
- stronger decorative character
Suitable for:
- borders
- feature zones
- landscape accents
The best size depends on viewing distance and pavement texture.
Coverage Density Should Be Tested, Not Guessed
Another important factor is how much photoluminescent aggregate is visible per square meter.
A light scatter may create a subtle star-like effect.
A medium density may provide clearer route recognition.
A high density may create a stronger visual surface.
The correct level depends on:
- project purpose
- budget
- nighttime environment
- design style
Instead of immediately using the highest possible quantity, create several sample densities.
Then compare them side by side.
Build a Three-Zone Test Panel
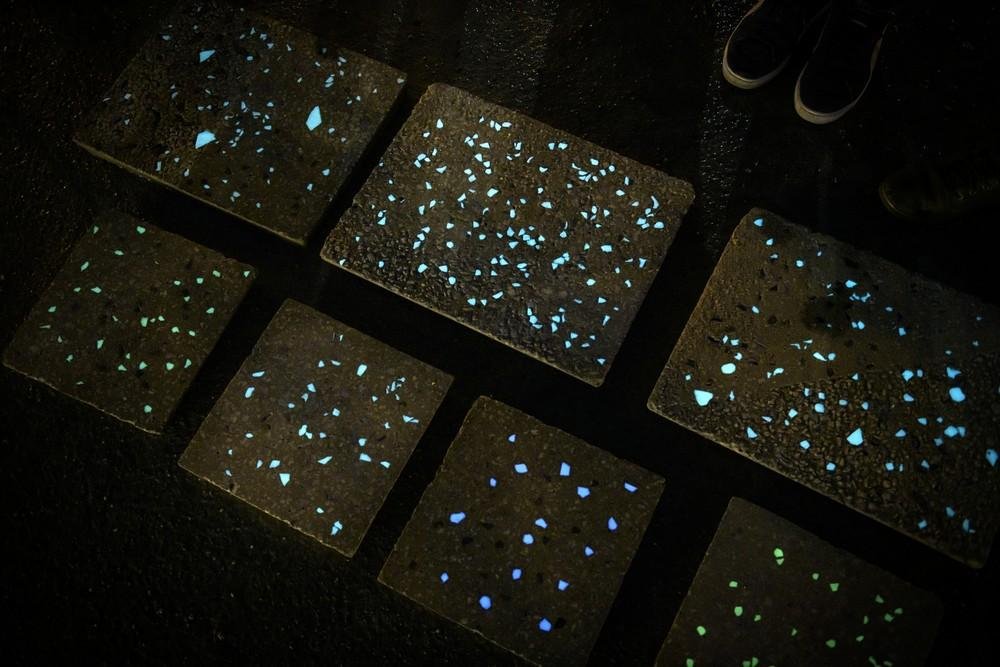
A very practical project test is to create one sample panel with three sections.
Zone A: Light Coverage
For:
- decorative effect
- lower material consumption
Zone B: Medium Coverage
For:
- general pathways
- balanced cost and visibility
Zone C: High Coverage
For:
- feature areas
- strong visual impact
Evaluate all three under the same conditions.
This can help the project team determine whether additional material actually creates enough visual improvement to justify the extra cost.
Test Glow Color Side by Side
Glow colors should also be compared together.
Typical colors include:
- blue
- blue-green
- yellow-green
Do not compare one sample today and another sample tomorrow.
Place them together.
Charge them together.
Observe them together.
This provides a much more reliable visual comparison.
Daytime Appearance Is Part of Performance
A pavement may only glow at night, but users see it throughout the day.
A good evaluation should therefore check:
- particle color
- surface texture
- pavement appearance
- pattern visibility
- compatibility with surrounding materials
For landscape and architectural projects, daytime appearance can be just as important as nighttime performance.
Use the Actual Installation Method in the Test
If the final project uses concrete, test the aggregate in concrete.
If the project uses asphalt, test it in asphalt.
If it uses resin, make a resin sample.
Do not approve a large asphalt project based only on a loose bowl of glow stones.
The installation system can dramatically change the visible result.
Concrete Sample Testing
For concrete, check:
- particle embedment
- surface exposure
- aggregate distribution
- finished texture
- daytime appearance
Then evaluate the same sample after dark.
The goal is to confirm that the particles remain secure while enough luminous surface stays visible.
Asphalt Sample Testing
For asphalt, pay attention to:
- rolling depth
- particle retention
- dark background contrast
- distribution consistency
Dark asphalt can create strong contrast, but only if the luminous particles remain sufficiently exposed.
Resin Sample Testing
For resin systems, evaluate:
- binder clarity
- particle visibility
- surface texture
- color stability
- aggregate retention
A resin system may make the glow material look different from a concrete or asphalt installation.
Take Photographs Carefully
Photos are useful for project records.
But they should be used consistently.
Try to keep:
- camera position
- exposure settings
- viewing distance
- time after charging
similar between comparisons.
Automatic phone night mode can exaggerate the glow dramatically.
If possible, also include a photograph that represents what the human eye actually sees.
Avoid Comparing Edited Marketing Images
Marketing images can be useful for inspiration.
They should not be the only basis for product selection.
Highly edited images may change:
- brightness
- saturation
- contrast
- background darkness
For commercial projects, physical samples and test panels are much more reliable.
Create a Simple Project Testing Record
For larger projects, record the test conditions.
A simple record might include:
Product: Photoluminescent Aggregate
Color: Blue-Green
Particle Size: 5–10mm
Substrate: Concrete
Coverage: Medium Density
Charging Source: Daylight
Observation: Daytime / Sunset / Night
Installation Method: Surface Seeded
Sample Approval: Accepted / Adjust Required
This makes project communication easier.
Test in More Than One Location
Long pathways may pass through very different environments.
One area may receive full sunlight.
Another may be shaded by trees.
Another may pass close to street lighting.
For larger projects, choose representative test locations.
Examples:
- open sunny section
- shaded section
- bright urban section
- dark landscape section
This gives a more realistic picture of expected performance.
Consider Seasonal Changes
Site conditions change through the year.
A pathway may receive strong sunlight in summer but more shade in winter.
Trees may lose leaves.
Weather may change.
Maintenance conditions may also vary.
For major public projects, seasonal conditions should be considered when setting expectations.
What Should Project Acceptance Focus On?
A good acceptance process should not rely on one number or one night photograph.
Instead, check several factors:
- approved glow color
- particle size
- distribution
- surface exposure
- daytime appearance
- nighttime visibility
- texture
- consistency
The approved sample panel should become the visual reference for the full installation.
Common Testing Mistakes
Comparing Samples Charged Differently
This creates misleading results.
Looking Only at Initial Brightness
Afterglow behavior matters too.
Testing Loose Material Only
Installed pavement can look very different.
Ignoring Ambient Light
Real sites rarely have perfect darkness.
Using Camera Photos as the Only Evidence
Night mode can exaggerate performance.
Skipping the Actual Project Substrate
Concrete, asphalt and resin create different effects.
Frequently Asked Questions
How should glow stone brightness be compared?
Use the same charging conditions, observation time and environment for every sample.
Should I test loose stones or pavement samples?
Both are useful, but installed samples provide more realistic project information.
Why does the same material look brighter on asphalt?
Dark asphalt can create stronger visual contrast.
Can streetlights reduce visible glow?
Yes. Strong surrounding lighting can reduce perceived contrast.
Is the brightest sample always the best choice?
Not necessarily. Particle size, durability, daytime appearance, installation compatibility and project requirements also matter.
Should large projects use a test section?
Yes. A representative test section can reduce uncertainty before full installation.
Final Thoughts
Evaluating photoluminescent pavement should be treated as a controlled project test, not a photography contest.
The strongest-looking image does not automatically represent the best material.
A reliable evaluation considers:
charging conditions + afterglow + surface exposure + contrast + viewing distance + installation method
For large projects, build a representative sample using the real pavement system.
Then evaluate it during both daytime and nighttime conditions.
That gives designers, contractors and buyers much better information than comparing promotional images online.