
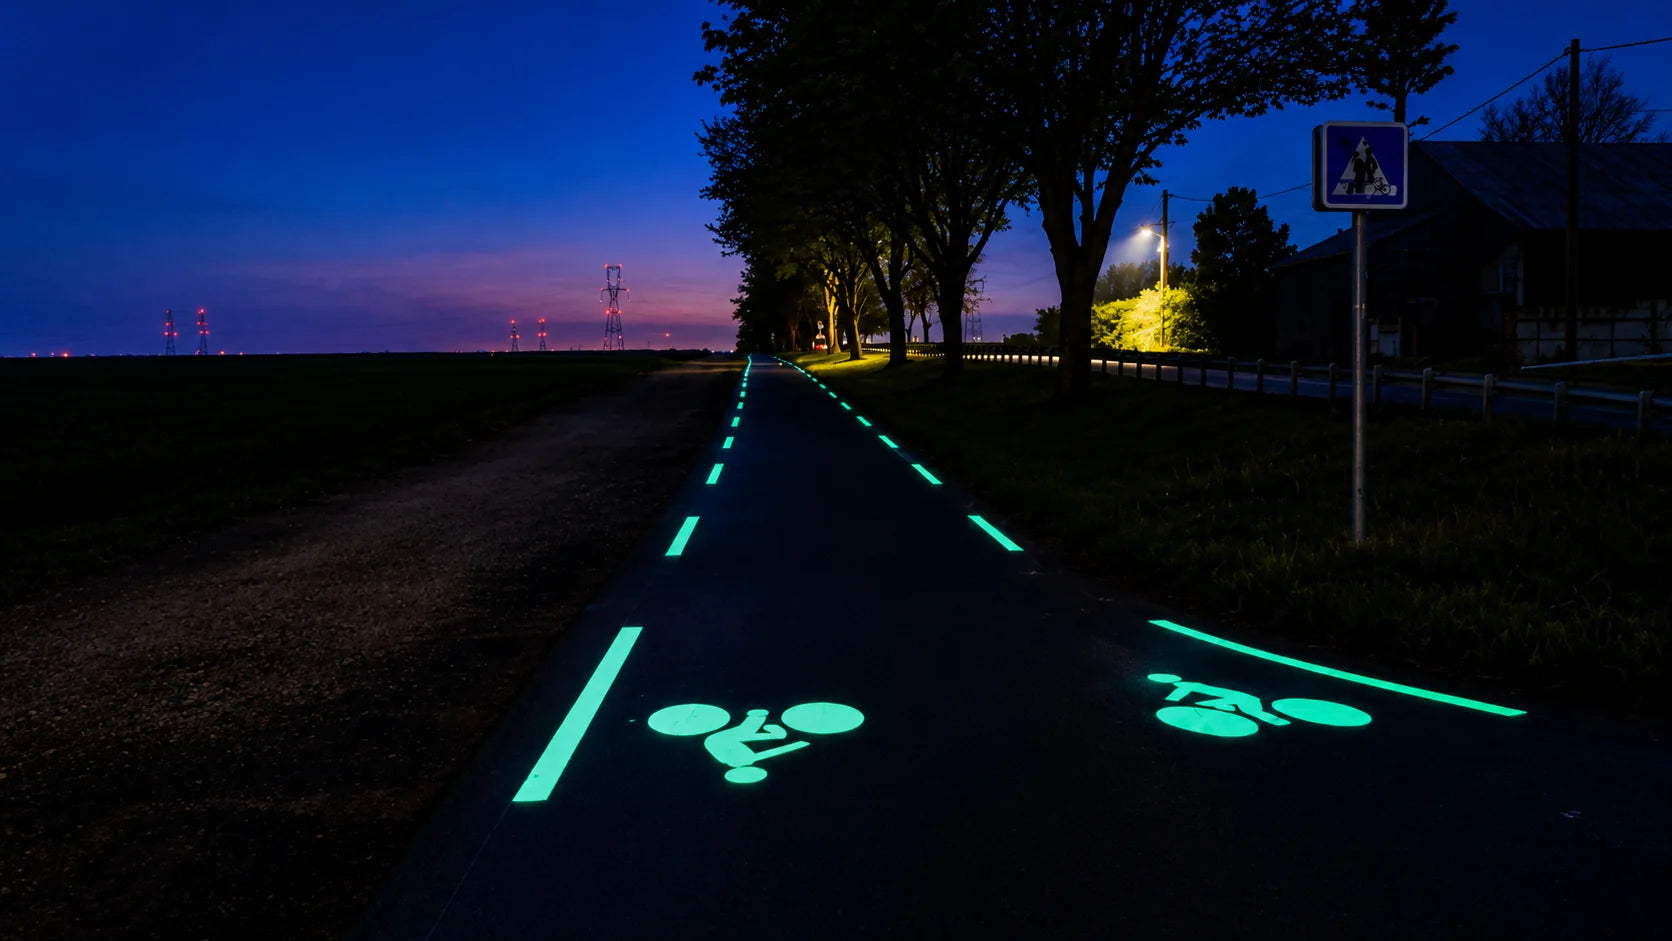
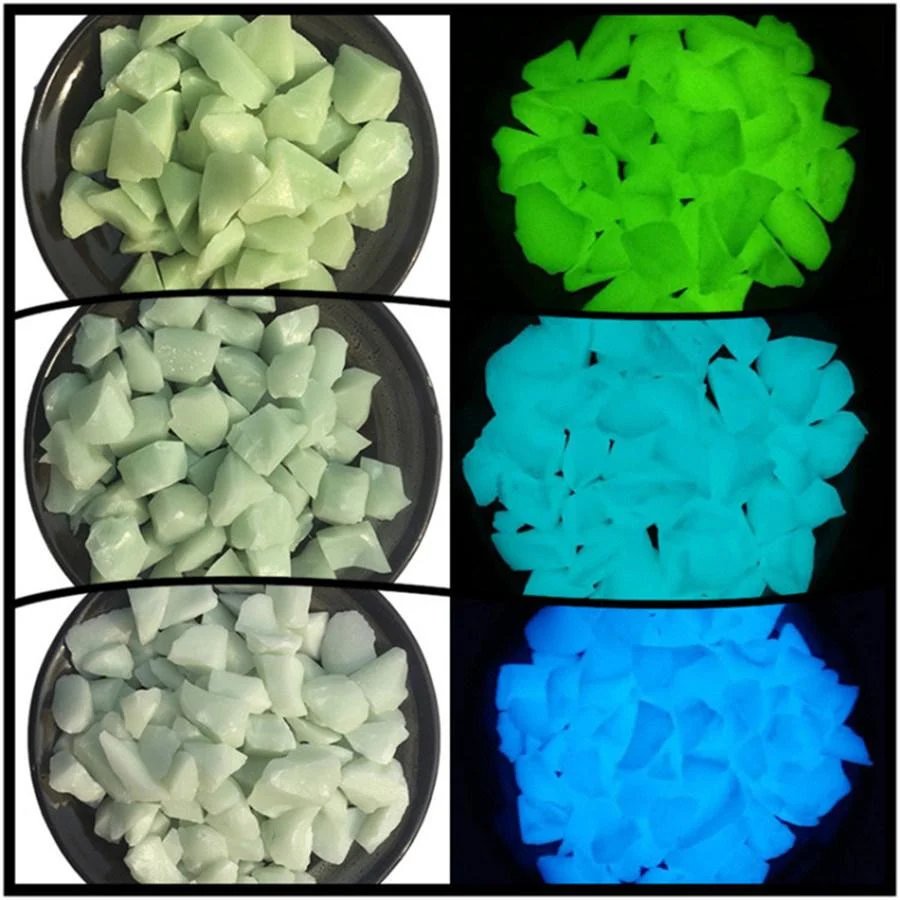
Test photoluminescent aggregate under controlled conditions and in an installed sample before placing a large paving order. A bright nighttime photograph does not show how long a sample was charged, which light source was used, how dark the room was, whether camera exposure was increased, how it performs after installation or how much brightness remains after one or two hours.
For a small decorative project, those differences may matter less; for a large pathway, park, resort, pool deck or commercial surface, they matter much more. Compare samples under the same charging and observation conditions, then test the material in your actual pavement system. The goal is performance under real project conditions, not simply the brightest stone in the first minute.
Why Supplier Photos Are Not Enough
Glow materials are difficult to judge from photographs.
A smartphone automatically adjusts:
- exposure
- ISO
- brightness
- contrast
- white balance
Two glow stones with very different real brightness can look almost identical in edited photos.
The opposite can also happen.
A relatively weak material may look extremely bright if photographed with a long exposure in complete darkness.
So when comparing suppliers, treat nighttime photos as a visual reference rather than a technical performance test.
A physical sample is much more useful.
Test All Samples Under the Same Conditions

The most important rule is simple:
Do not compare samples unless they are charged and observed under the same conditions.
If one sample is charged outdoors for one hour and another is charged under an indoor lamp for five minutes, the comparison is meaningless.
For a fair test, keep these conditions the same:
- light source
- distance from the light
- charging time
- sample quantity
- observation environment
- observation time
If possible, test several suppliers at the same time.
Place the samples next to each other, charge them together and move them into the same dark area.
This gives you a much more realistic comparison.
Compare brightness decay at several observation times
One common mistake is choosing a glow aggregate based only on how bright it looks immediately after charging.
Initial brightness is important, but it is only part of the story.
A useful test should look at brightness at several time points.
For example:
Immediately after charging
Check the initial visual intensity.
After 30 minutes
See which sample maintains a stronger visible glow.
After 1 hour
Compare the decay between samples.
After several hours
Check whether the material remains visible in a dark environment.
This helps you understand the afterglow behavior rather than just the first impression.
For outdoor paving, this is often more useful than a single “glow time” number.
Compare loose material and installed samples
Loose stones in a black box can look impressive.
But that is not how the material will be used on a real project.
Once photoluminescent aggregate is installed into concrete or resin, several things change:
- part of the stone may be buried
- the pavement color affects contrast
- cement paste may cover part of the luminous surface
- particle distribution changes
- nearby lighting affects perceived brightness
This is why a good purchasing test should have two stages:
Loose material test
and
installed sample test
The installed sample is much closer to the final result.
Make a Small Concrete Test Panel
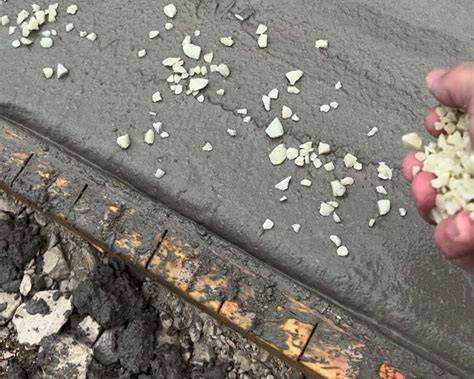
For concrete pathway projects, prepare a small sample panel using the same or similar concrete planned for the real project.
A simple panel can help you evaluate:
- aggregate size
- broadcasting density
- embedment depth
- surface exposure
- concrete color
- nighttime appearance
For example, you might prepare three areas:
1–5mm aggregate
5–10mm aggregate
a mixed-size surface
Charge them under the same conditions and compare the finished effect.
This is much more informative than looking at three bags of loose material.
Test Surface Exposure Carefully
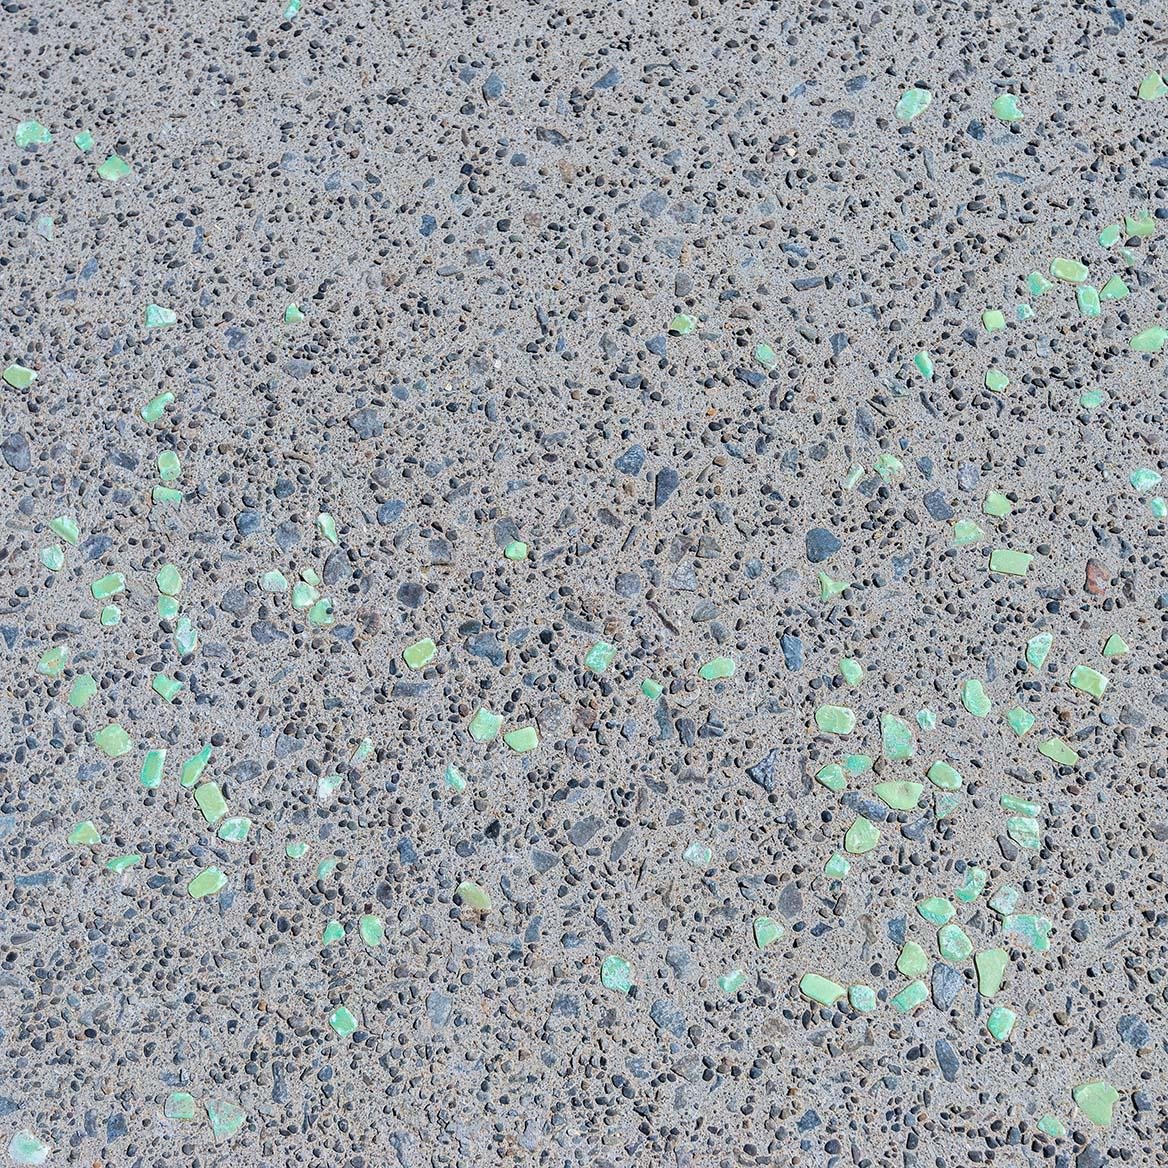
One of the most important things to observe is how much of each particle remains exposed.
A photoluminescent stone can only contribute effectively if enough of its surface can receive light and remain visible at night.
If the aggregate is buried too deeply:
- less surface receives daylight
- less luminous area is visible
- the pavement may appear weaker
If the stones are left too high:
- bonding may be poor
- particles may loosen
- the surface may become uncomfortable or uneven
A good test panel helps find the correct balance.
Compare Particle Sizes in the Real Surface
Particle size changes more than appearance.
It also changes the way the glow is distributed.
1–5mm
Creates many small luminous points.
The effect can look:
- finer
- denser
- more uniform
This can work well for decorative concrete and smaller pathways.
5–10mm
Creates more individually visible particles.
It often provides a good balance between:
- visual texture
- glow visibility
- surface distribution
This size is useful for many general landscape applications.
10–20mm
Creates larger glowing points with stronger individual visual impact.
It is better suited to:
- feature areas
- borders
- landscape decoration
- larger exposed aggregate designs
A sample panel quickly shows which effect fits your project best.
Compare Glow Colors Under the Same Lighting
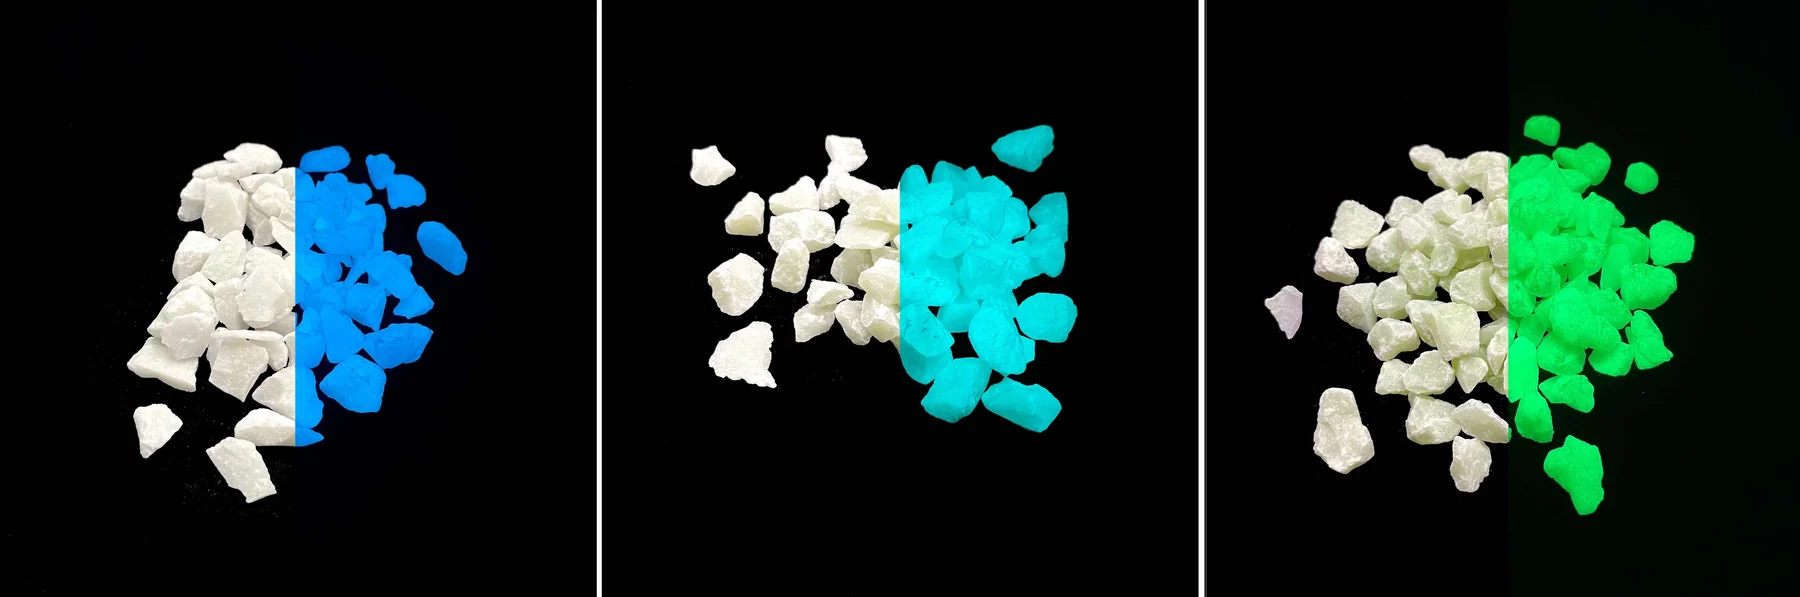
Blue, blue-green and yellow-green may look very different once installed.
Do not compare one color in a dark room and another outdoors.
Charge them together and view them together.
Blue
Usually produces a cooler, decorative appearance.
Useful for:
- modern landscapes
- pools
- resorts
- decorative paths
Blue-Green
Offers a balanced visual effect.
Often suitable for:
- pathways
- courtyards
- landscape paving
- public areas
Yellow-Green
Often appears more noticeable to the human eye in dark conditions.
It may be preferred when nighttime visibility is more important.
The best color is not always the one that looks brightest in a product photo.
It is the one that works best with the actual pavement and surrounding environment.
Test the Actual Charging Environment
This is where many project evaluations go wrong.
A sample may perform extremely well after being charged under strong sunlight.
But what if the real pathway is:
- under trees
- between buildings
- under a roof
- shaded most of the day
- exposed mainly to indoor lighting
The charging environment can strongly affect the final result.
Before making a large order, test the sample under lighting conditions similar to the actual project.
If the site receives only limited daylight, this needs to be considered before installation.
Using more glow stones cannot always compensate for poor charging conditions.
Test the Sample Wet and Dry
For outdoor applications, do not evaluate the material only when it is dry.
Water can change the visual appearance of concrete and aggregate.
If the project is for:
- pool decks
- outdoor pathways
- courtyards
- parks
- landscape paving
wet the sample and inspect it again.
Check:
- surface appearance
- particle exposure
- contrast
- slip resistance
- whether the aggregate remains firmly embedded
This is especially useful for poolside and rainy environments.
Test stability and appearance during normal cleaning
Outdoor paving will eventually need cleaning.
Before approving a system, it is useful to test how the sample responds to normal maintenance.
Depending on the project, this may include:
- water washing
- brushing
- mild cleaning
- normal pedestrian traffic
The aim is not to damage the sample intentionally.
The aim is to confirm that the aggregate remains securely bonded under realistic maintenance conditions.
If particles become loose after basic cleaning, the problem may be related to the installation system rather than the glow material itself.
Control Your Camera When Taking Comparison Photos
If you need to document the test, keep the camera settings consistent.
Avoid taking one photo with automatic night mode and another with normal exposure.
For a fair visual record:
- use the same phone or camera
- keep the same position
- keep the same distance
- disable major automatic exposure changes if possible
- photograph all samples in the same frame
A side-by-side photo is usually much more reliable than separate images.
This also helps when discussing the result with project owners or contractors.
Compare brightness retention, not glow duration alone
Buyers often ask suppliers:
“How many hours does it glow?”
That question is understandable, but it is not enough.
A material may technically remain visible for many hours but become very dim after the first part of the night.
Another product may have:
- stronger initial brightness
- slower brightness decay
- better visibility after one hour
For real paving projects, you should consider the entire brightness curve, not just the final point where glow becomes barely visible.
This is why direct sample comparison is so important.
A Practical Supplier Comparison Method
When we evaluate photoluminescent aggregate for a project, a useful comparison includes:
Material appearance
Check particle shape, color and consistency.
Particle size
Confirm whether the supplied size matches the specification.
Charging response
Observe how quickly the material becomes visibly luminous.
Initial brightness
Compare immediately after charging.
Afterglow retention
Compare again after 30 minutes, one hour and later.
Installation behavior
Check how well the aggregate embeds into concrete or resin.
Surface visibility
Confirm that the particle remains sufficiently exposed.
Final project appearance
Evaluate both daytime and nighttime aesthetics.
This gives a much more complete picture than simply asking for the cheapest price per kilogram.
One Test We Recommend Buyers Avoid
Do not charge one sample with a UV flashlight for several minutes and then compare it with a sample that was only exposed to normal room light.
This may create a dramatic visual difference, but it tells you very little about actual project performance.
A fair comparison requires the same charging conditions.
This sounds simple, but it is one of the most common reasons buyers reach the wrong conclusion during sample testing.
What Should You Ask a Supplier Before Ordering?
A reliable supplier should be able to answer practical project questions, not only send a price.
Useful questions include:
- What particle sizes are available?
- What glow colors are available?
- Is the aggregate suitable for outdoor paving?
- Can it be used with concrete?
- Can it be used with resin systems?
- How should it be installed?
- How should samples be charged for comparison?
- Can you provide material samples?
- What installation density is recommended?
- Can you help calculate project consumption?
For larger projects, it is also useful to provide the supplier with:
project area + pavement type + particle size + desired effect + site conditions
before requesting a final recommendation.
A Real-World Lesson: The Brightest Loose Sample May Not Win
This is an important point.
Imagine two samples.
Sample A looks extremely bright when placed loose on a black surface.
Sample B looks slightly less bright.
After installation, Sample A becomes mostly buried under cement paste.
Sample B remains properly exposed and evenly distributed.
The finished pavement using Sample B may look better.
So the best material is not always the sample that wins a tabletop test.
The final performance depends on:
material quality + installation + surface exposure + charging conditions
That is why the test panel is so important.
Frequently Asked Questions
How long should I charge glow stone samples?
For comparison, the exact charging time matters less than making sure every sample receives the same light source and charging period. For project testing, use conditions similar to the actual installation site.
Should I test glow aggregate in complete darkness?
A dark environment helps compare material performance, but you should also evaluate the sample under the real nighttime lighting conditions of the project.
Can I compare samples using phone photos?
Yes, but place all samples in the same image and avoid changing exposure settings between samples.
Should I test the aggregate in concrete before buying?
For a large project, yes. A small concrete test panel provides much more useful information than loose stone samples alone.
Which particle size should I test first?
For many pathway projects, 5–10mm is a practical starting point, while 1–5mm is useful for a finer effect and 10–20mm for larger decorative features.
Should I test more than one glow color?
Yes, especially if appearance is important. Blue, blue-green and yellow-green can look very different once combined with the final pavement color.
Verify sample performance in the complete paving system
Testing photoluminescent aggregate before a paving project does not need complicated laboratory equipment.
A careful side-by-side sample test can already tell you a lot.
The most important thing is to control the conditions and evaluate more than initial brightness.
Compare:
charging response, afterglow, particle size, installation behavior, surface exposure and real project appearance.
For larger projects, go one step further and build a small pavement test panel.
That small test can prevent a much larger mistake after hundreds or thousands of square meters have already been installed.